Introducing ViewSpace’s Products
In order to navigate this guide, you must first understand the types of content and resources ViewSpace provides.Videos
ViewSpace’s videos explore a range of Earth and space science topics, highlighting news and discoveries from NASA. These videos feature stunning images from space telescopes and Earth- observing satellites, visualizations, and captions to help guide the narrative.
To view a single video on a particular topic, use the main navigation on viewspace.org to go to Videos, and then Video Library. From there, you can use the Sort feature, Search Topics bar, or Popular Topics drop-down menu to filter videos.
Video Collections
ViewSpace’s video collections engage visitors in NASA science while inspiring them to learn about the wonders of our universe. Libraries, museums, science centers, and other informal learning venues can set up a monitor to play a continually updating set of Earth, Space, or ViewSpace (both Earth and Space) collection videos (collectively referred to as ViewSpace’s video collections).
To get started, review the "Setting up ViewSpace's Video Collections as a Kiosk (Exhibit)" section of this guide, and watch our ViewSpace Video Library & Collections Tutorial above.
Interactives
ViewSpace’s interactives enable users to explore NASA data in greater detail at their own pace. Users explore scientific stories that illustrate how objects change over time, how different wavelengths of light can reveal unique details, and delve into the details of NASA images.
To explore individual ViewSpace interactives, use the main navigation on viewspace.org to select Interactives, and then visit the Image Tours or Image Sliders libraries. Check out About the Interactives to learn how to use the interactives.
Interactive Apps
ViewSpace’s free Interactive Apps provide direct access to the complete library of ViewSpace’s interactives from a tablet or a computer desktop. The device can be locked to prevent users from navigating away from the interactives library, making the apps ideal for use as interactive kiosks or to complement informal education programs and activities.
To get started, review the "Installing ViewSpace’s Interactive Apps" section of this guide, and watch our ViewSpace Interactives Tutorial above.
Setting up ViewSpace Video Collections as a Kiosk (Exhibit)
To display ViewSpace Video Collections properly, make sure you have all of the following:
- An internet-connected device (e.g., tablet, laptop, or computer) with the most up-to-date version of its operating system
- Reliable internet access that supports streaming video
- A modern, up-to-date web browser (e.g., Microsoft Edge, Google Chrome, Firefox, or Safari)
- Optional: An external display (e.g., monitor or projector) to show ViewSpace's videos on a larger screen while securing the internet-connected device streaming the videos
Note: We present one way of setting up ViewSpace as a kiosk or exhibit using Microsoft Edge on a computer running Windows 10 Pro. The instructions are similar for equivalent versions of Windows. Users have been successful setting up ViewSpace using other browsers and devices.
To access ViewSpace’s video collections, you will need to be invited into the system after requesting an account. The invitation will arrive in the form of an email from ViewSpace support (support@viewspace.org). To receive an invitation:
- Go to Videos, then About the Videos and click on Request an Account. From there, you’ll be asked to enter your contact name, title, organization’s name, email, zip code, and type (e.g., museum, science center, or library).
Note: We highly recommend using a generic, organization-wide email address or a separate, ViewSpace-specific email when signing up for an account. This ensures continued access for staff and volunteers, even if employees change roles or leave the organization.
- Once you click Submit Account Request, you should hear back from the team within seven business days.
- If you are expecting an email but have not yet received it, check your email's junk or spam folders.
- If you still have not been sent an invitation after seven business days, please contact ViewSpace Support.
- Open the Accept Invitation link in the email from ViewSpace Support. This will take you to the Account Setup page.
- Register by creating a password of your choice.

Note: The email shown on the Account Setup page is the email that your invitation was sent to. If you want to register under a different email, please contact ViewSpace Support (support@viewspace.org).
- Complete your User Profile.
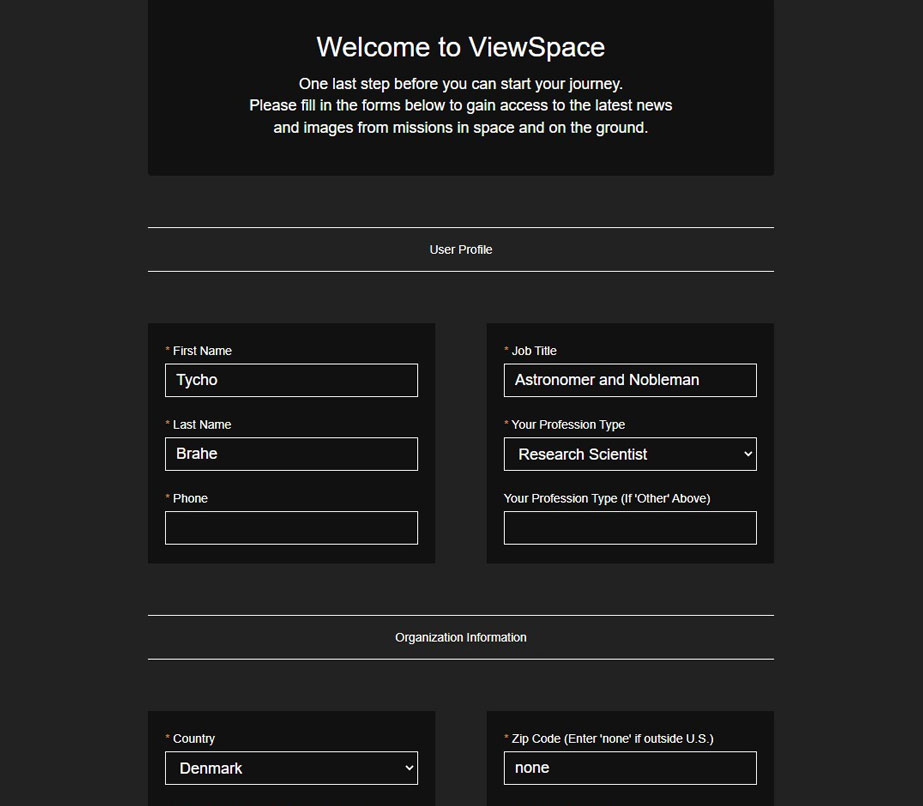
Note: If any of the required fields are incomplete, you will be prompted to fill them in. Do not forget to read and accept the terms and conditions.
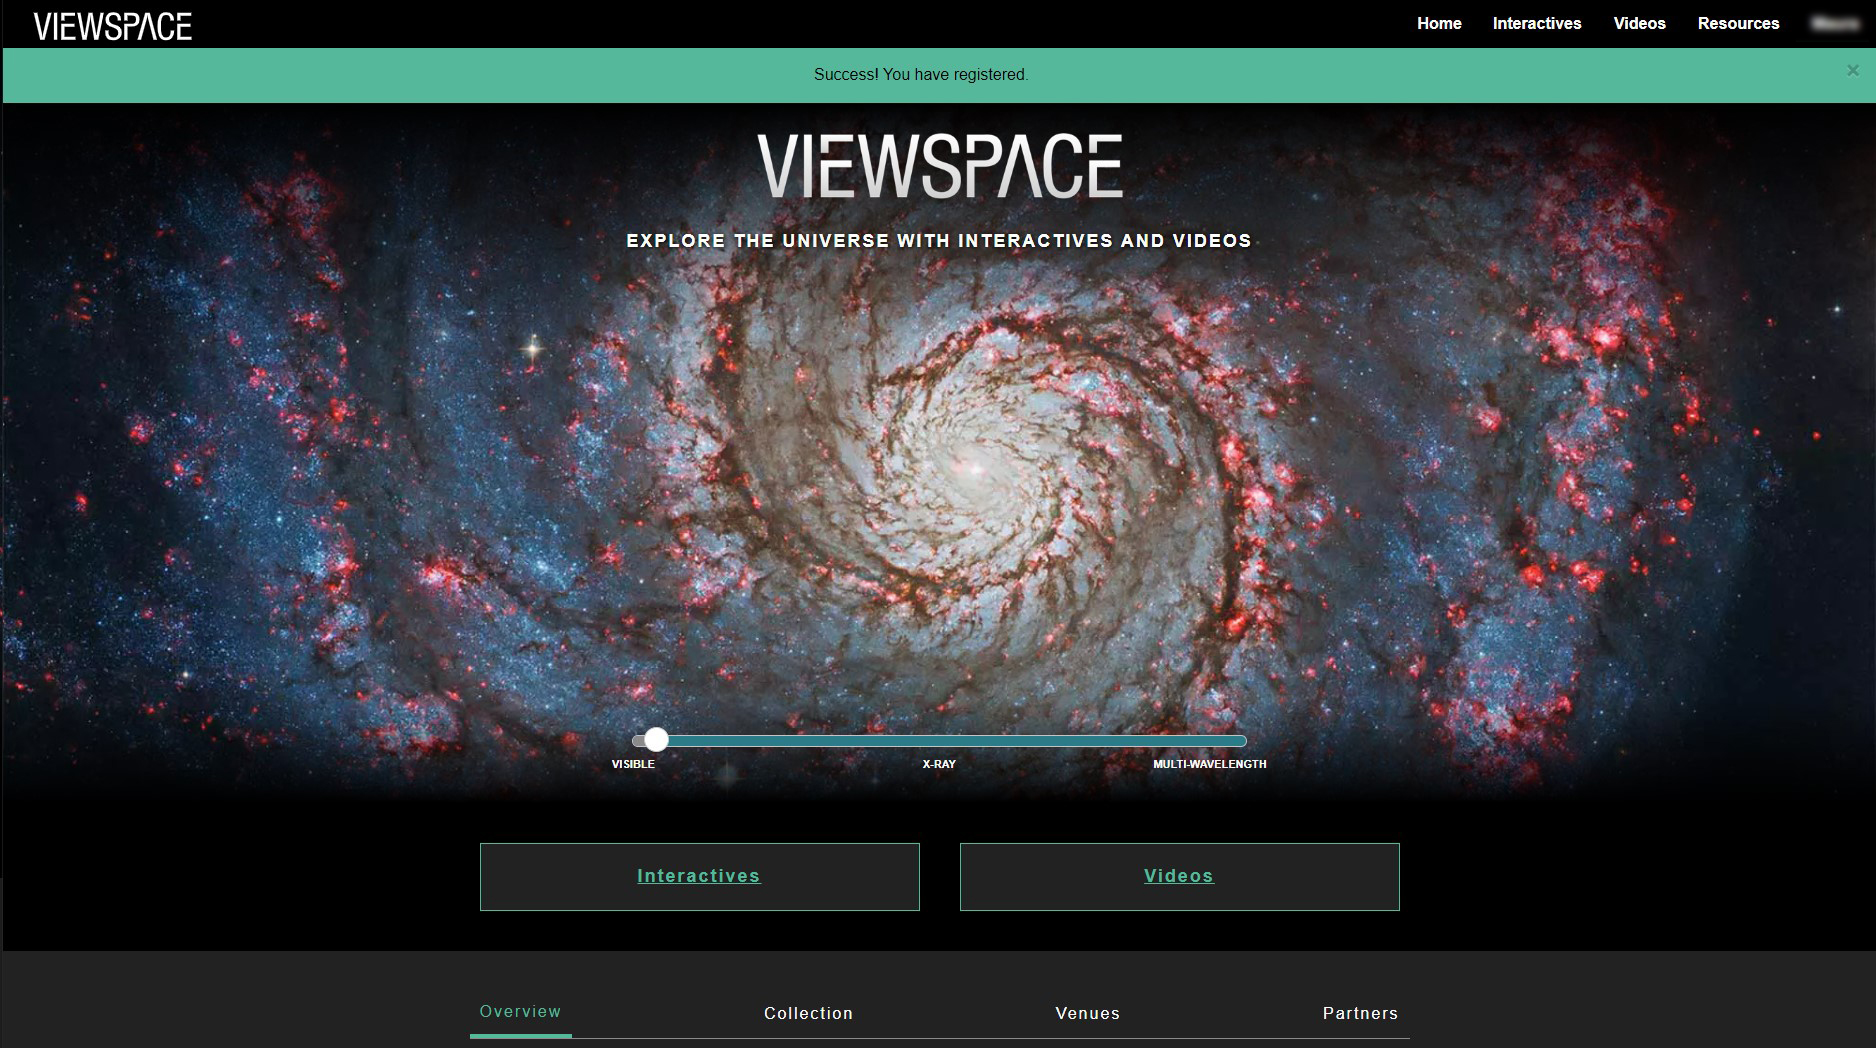
- Once you have submitted the form, your name should appear in the upper right corner of the screen. You are now free to use ViewSpace with your email and password.
Every ViewSpace video is produced with background music. However, many browsers currently do not permit videos to automatically play with sound. Because this functionality affects all videos, including those on ViewSpace, the default for ViewSpace auto-play is set to no sound. Enabling sound is a two-step process. First, you need to configure sound on your ViewSpace User Profile page. Second, you will need to update your browser to enable sound for auto-play. Below, we provide directions for how to allow sound to play on Microsoft Edge, Google Chrome, Firefox, and Safari.
Note: These configuration steps may change with browser updates. As of October 2024, the following instructions are up-to-date. If these instructions do not reflect your browser settings or layout, please inform ViewSpace support (support@viewspace.org).
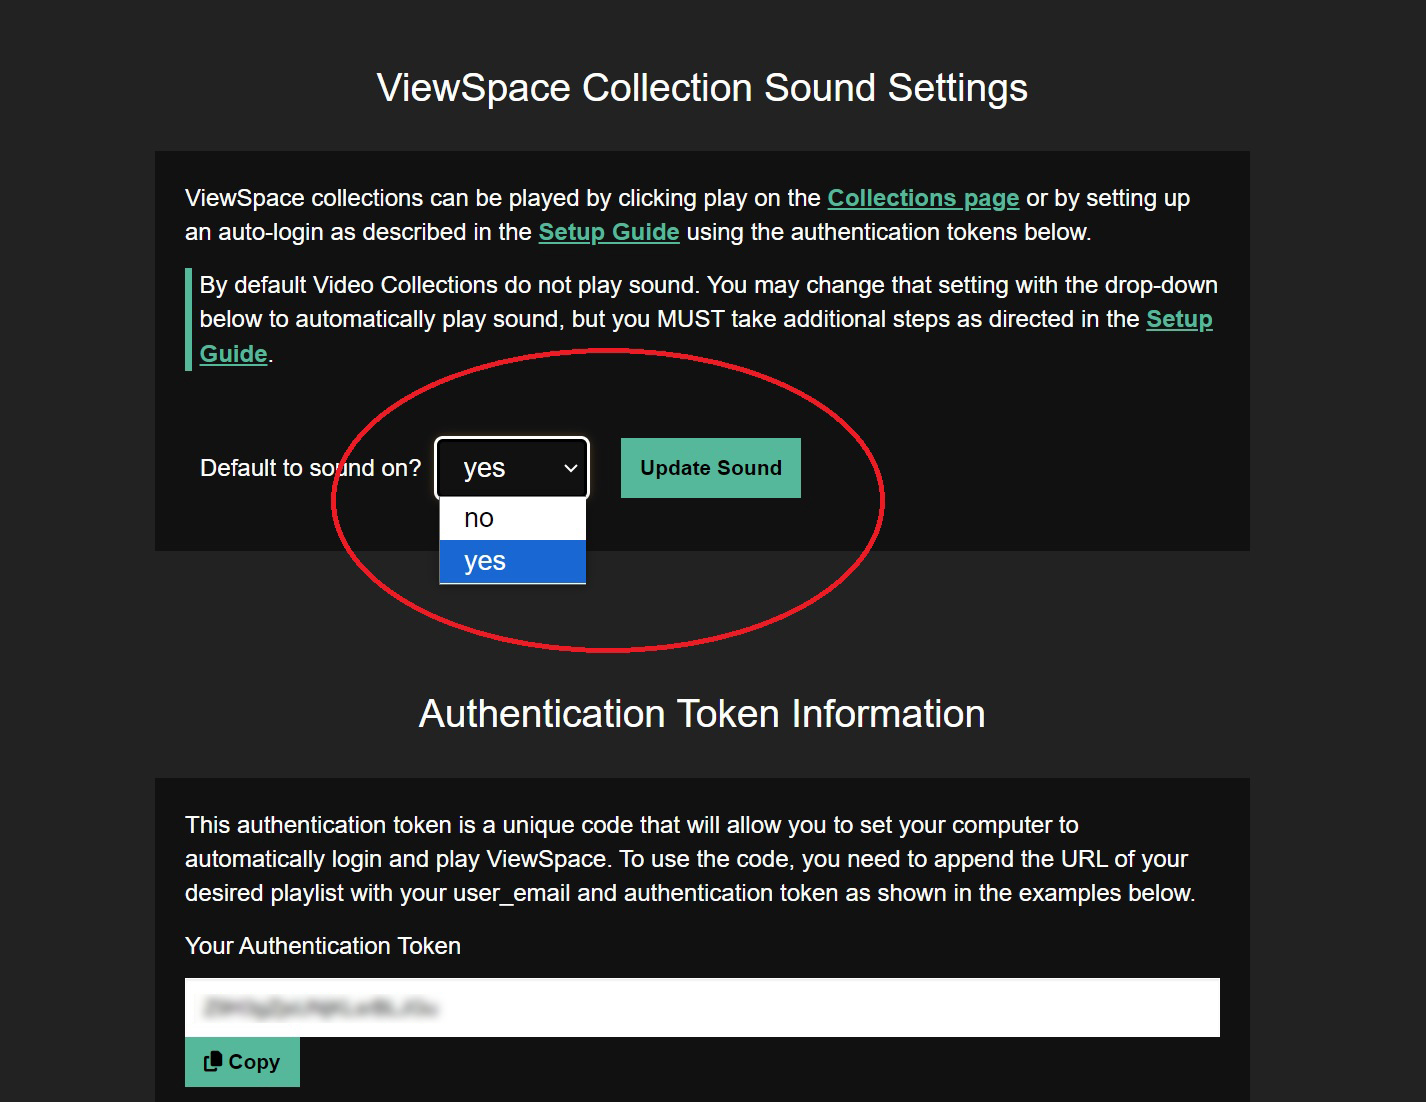
- On your User Profile, scroll down, set "Default to sound on?" to yes, and click Update Sound.
- You will get a pop-up reminding you that additional steps to configure your browser’s settings are necessary. Click OK.
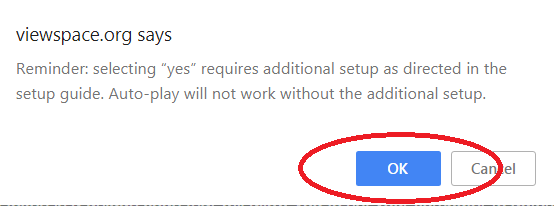
- You will get a pop-up reminding you that additional steps to configure your browser’s settings are necessary. Click OK.
- Navigate to your browser of choice and follow the respective instructions below for that browser.
To enable video sound during auto-play using Microsoft Edge:
- Navigate to the Site permissions / Media autoplay section within your Edge Settings via edge://settings/content/mediaAutoplay.
- In the Allow section, click Add and type
viewspace.orginto the field. These settings are automatically saved when you make the change and will apply to any ViewSpace page you navigate to.
- You have enabled sound for auto-play in Edge, see E. Playing Video Collections Manually or F. Playing Video Collections Automatically (Kiosk Mode) to start playing your video and continue your setup.
To enable video sound during auto-play using Google Chrome:
- Navigate to a page on ViewSpace.org in Chrome.
- Using the configure icon to the left of the web address, toggle Sound on to allow videos on viewspace.org to play with sound. These settings are automatically saved when you make the change and will apply to any ViewSpace page you navigate to.
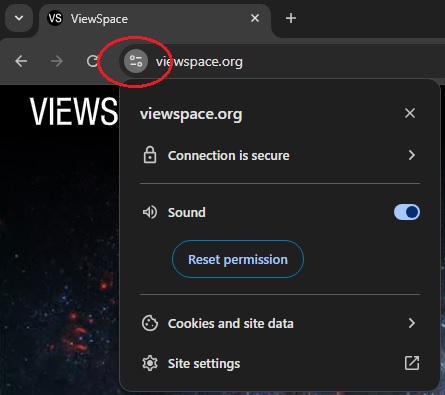
Note: If you do not see the configure icon to the left of the web address, ensure you are on a web page containing a video to complete this step.
- Additional sound settings can also be found in the Chrome Site settings at the bottom of the drop-down menu.
- You have enabled sound for auto-play in Chrome, see E. Playing Video Collections Manually or F. Playing Video Collections Automatically (Kiosk Mode) to start playing your video and continue your setup.
To enable video sound during auto-play using Firefox:
- Navigate to a page on ViewSpace.org in Firefox.
- Using the configure icon to the left of the web address, select Allow Audio and Video beneath Permissions for viewspace.org. These settings are automatically saved when you make the change and will apply to any ViewSpace page you navigate to.
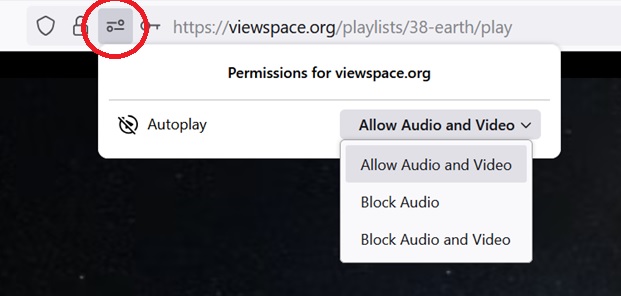
Note: If you do not see the configure icon to the left of the web address, ensure you are on a web page containing a video to complete this step.
- You have enabled sound for auto-play in Firefox, see E. Playing Video Collections Manually or F. Playing Video Collections Automatically (Kiosk Mode) to start playing your video and continue your setup.
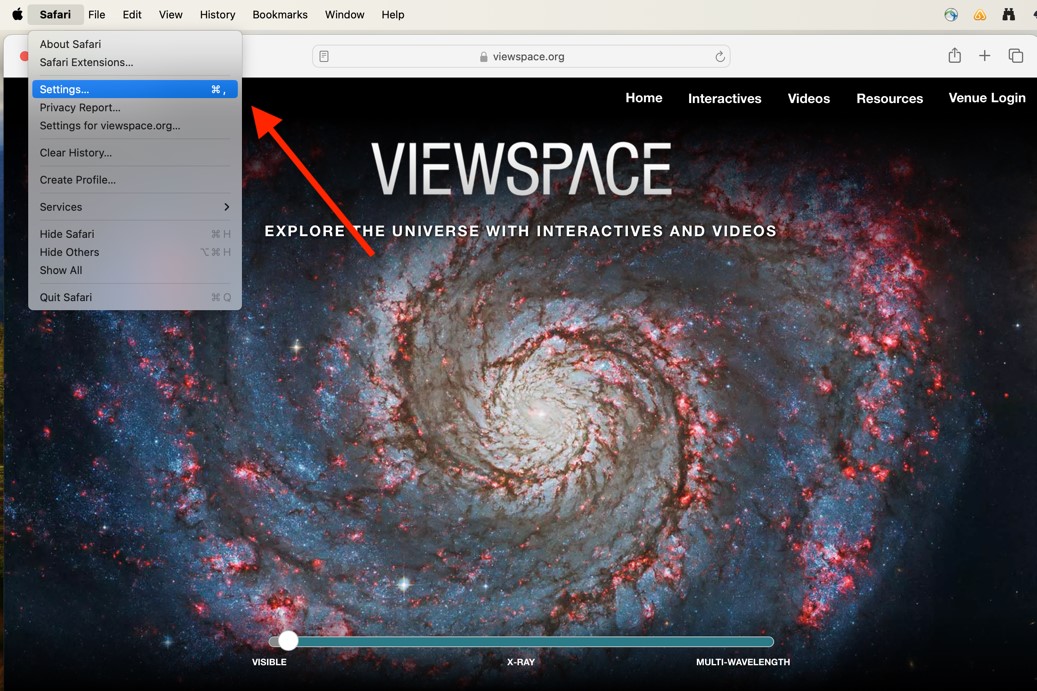
To enable video sound during auto-play using Safari:
Note: Safari only allows you to configure auto-play sound settings for sites that are currently opened in your browser.
- Navigate to a page on ViewSpace.org in Safari.
- Click on Safari from the menu bar at the top of your screen, then select Settings… from the drop-down menu.
- Choose Websites from the top control bar that appears, then select Auto-Play from the General sidebar on the left.
- Beneath Allow the websites below to automatically play media, you will find a list of currently open websites. Beside viewspace.org, select Allow All Auto-Play from the drop-down menu. This setting is automatically saved when you make the change and will apply to any ViewSpace page you navigate to.
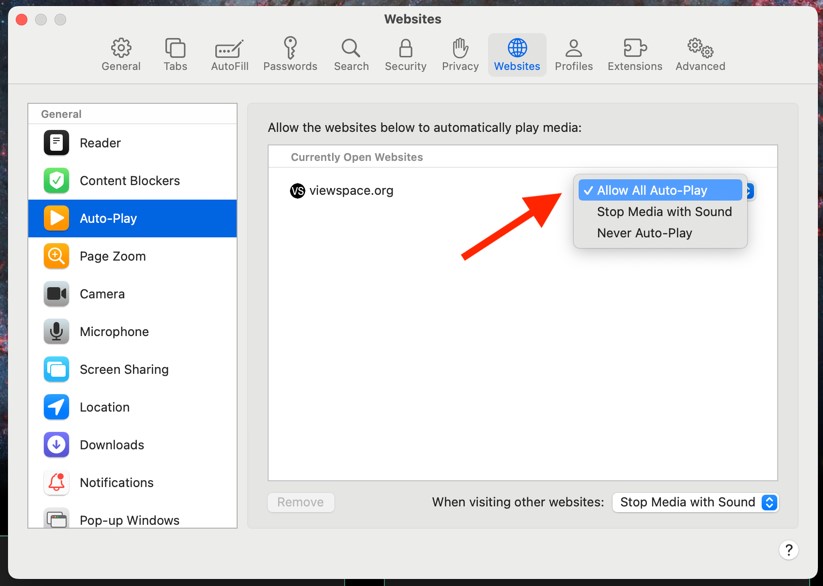
- You have enabled sound for auto-play in Safari, see E. Playing Video Collections Manually or F. Playing Video Collections Automatically (Kiosk Mode) to start playing your video and continue your setup.
Once you have registered, you can access ViewSpace’s video collections via any internet-connected device. To access the collections:
- Navigate to viewspace.org.
- Log in using the Venue Login button in the top right corner of the site.
- Enter your email address and password.
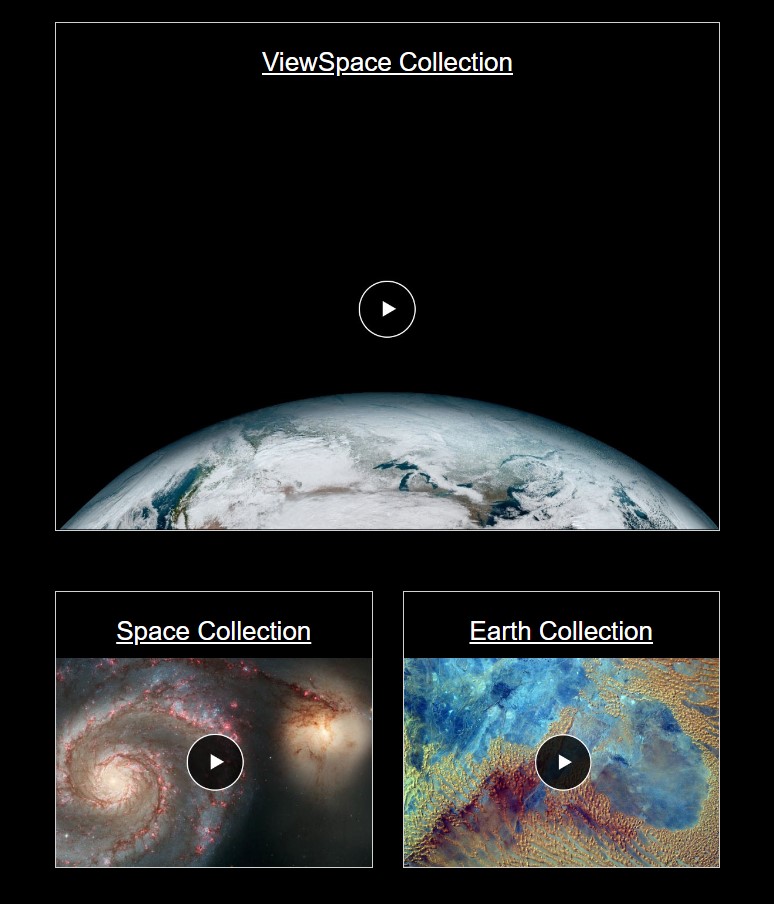
- You will be directed to the ViewSpace Video Collection page.
- Choose from one of three playlists by clicking on the respective image:
- The ViewSpace Collection plays all Earth and space shows
- The Space Collection plays videos focused on the Solar System, galaxy, and universe beyond Earth
- The Earth Collection plays videos focused on Earth
Note: To have the best viewing experience, we recommend expanding the video to full-screen. To configure your sound settings, please review this guide’s Section D. Enabling Sound (Optional).
You can configure a video collection to play automatically (kiosk mode) whenever your device restarts, eliminating the need for logging in. This ensures continued, seamless operation of ViewSpace as a video kiosk or exhibit. By setting up kiosk mode on your device, you can display ViewSpace videos without exposing any personal or institutional data.
While skipping this step won't hinder ViewSpace's functionality, the video collection will need to be manually restarted each time your device restarts.
Note: The following instructions walk through setting up kiosk mode using Microsoft Edge on a computer running Windows 11 Pro or later. However, we encourage users to experiment and use ViewSpace in a manner that works best for their organization. ViewSpace has been displayed in diverse configurations, ranging from planetarium projectors to mobile devices.
Set up Windows to act as a kiosk.
Note: You will need an Administrator account to complete these steps.
- Open the Settings on the Start menu. Open Accounts > Other Users.
Note: If you don’t see an “Other users” or “Family & other users” account, please reach out to your organization’s IT department.

- Under the Set up a kiosk header select Get Started.

- Name your Kiosk Profile and click Next.

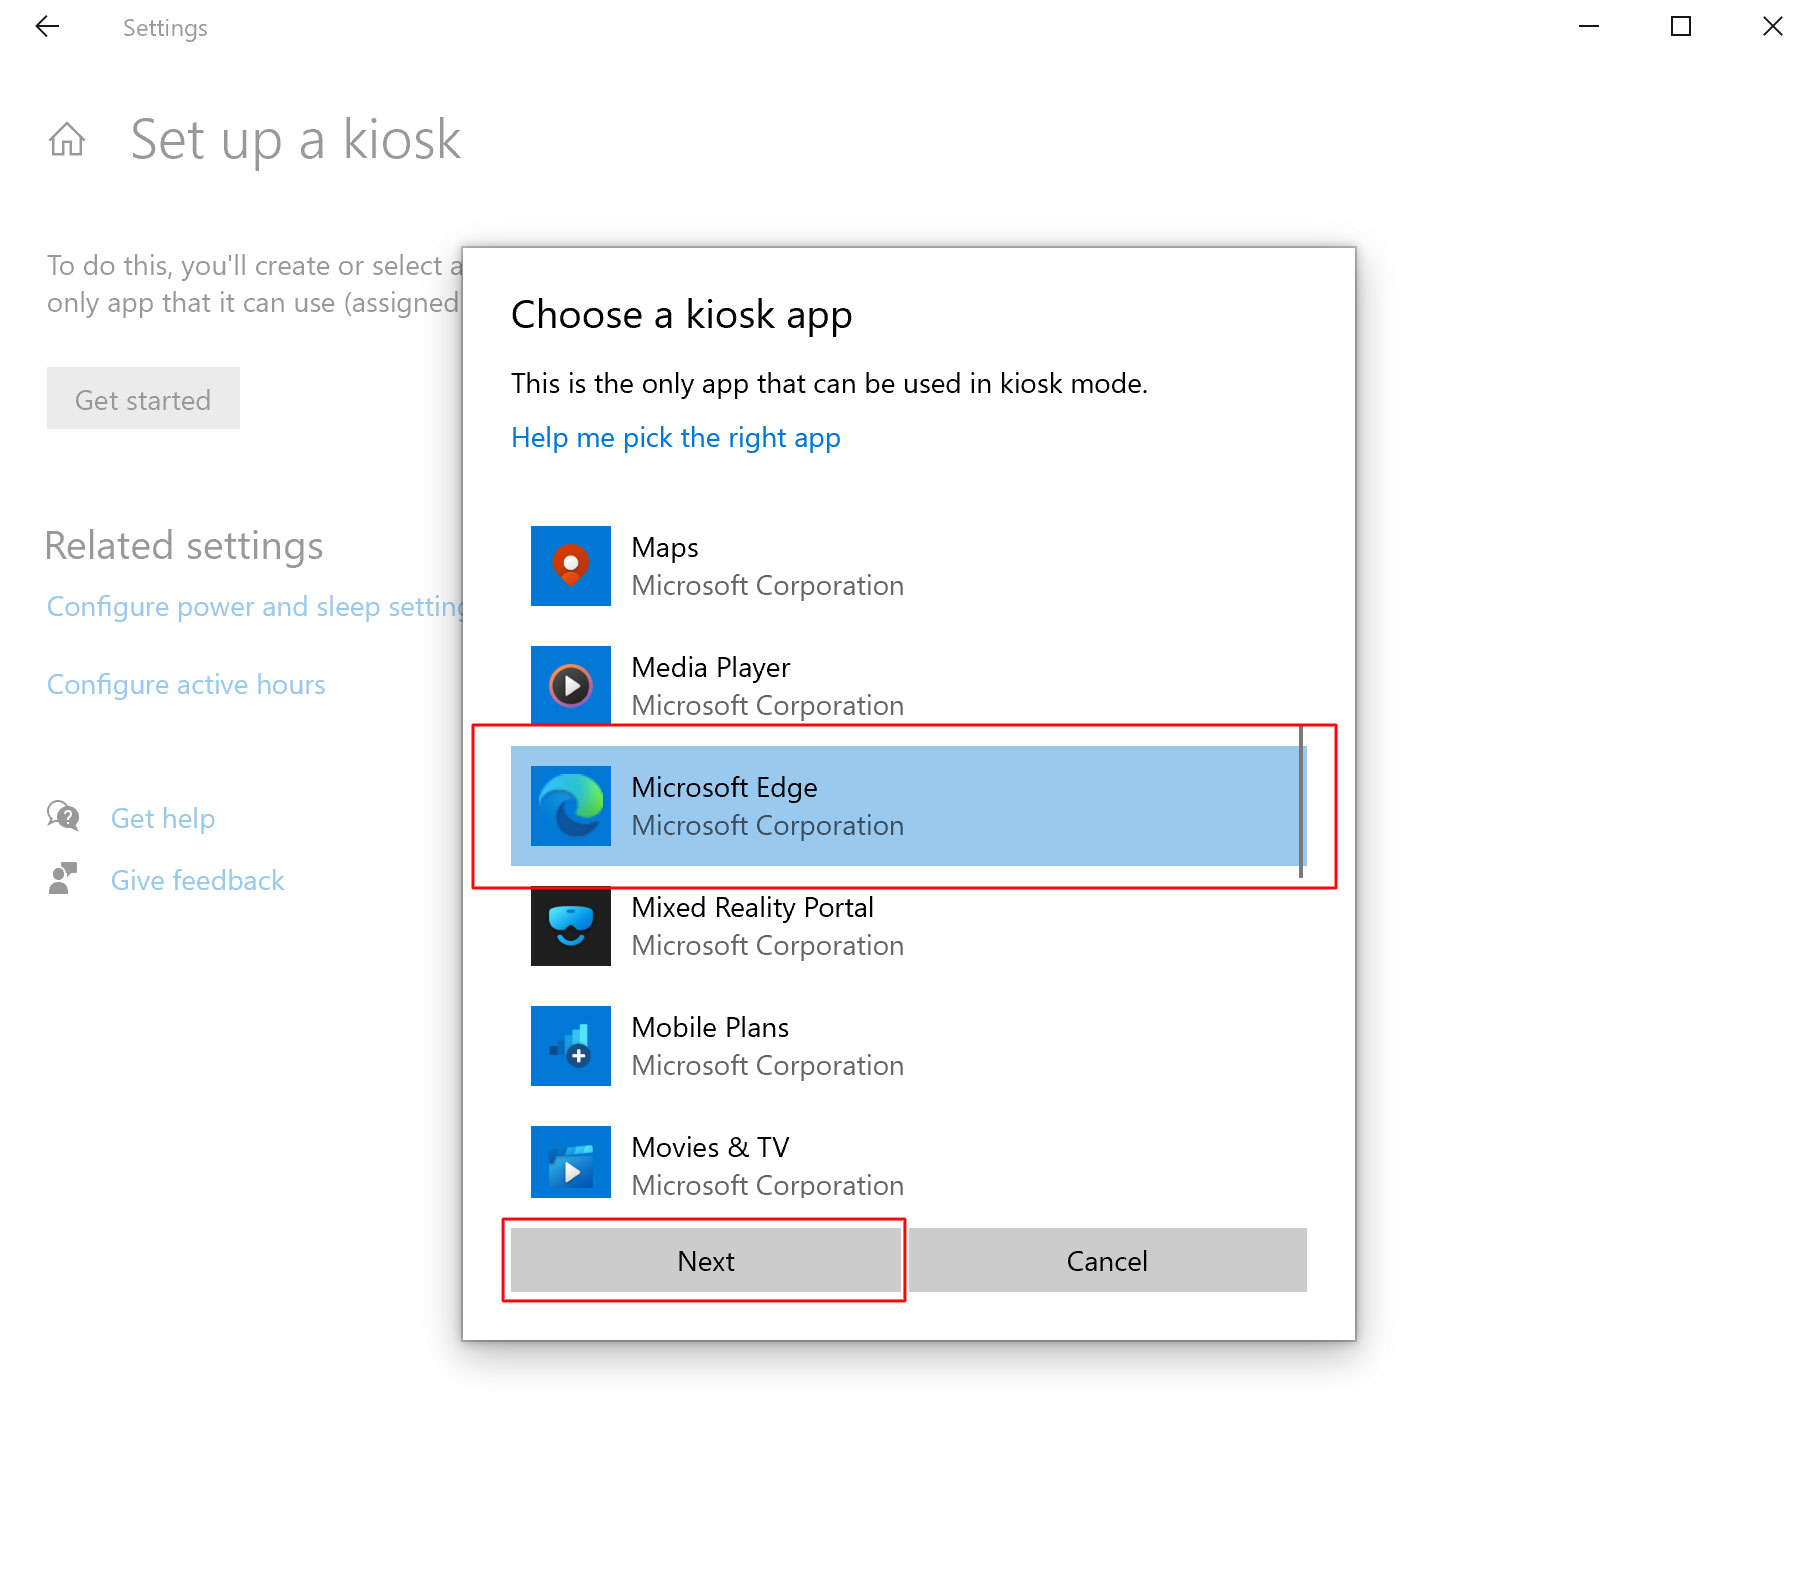
- Select Microsoft Edge from the available Kiosk Apps and click Next.

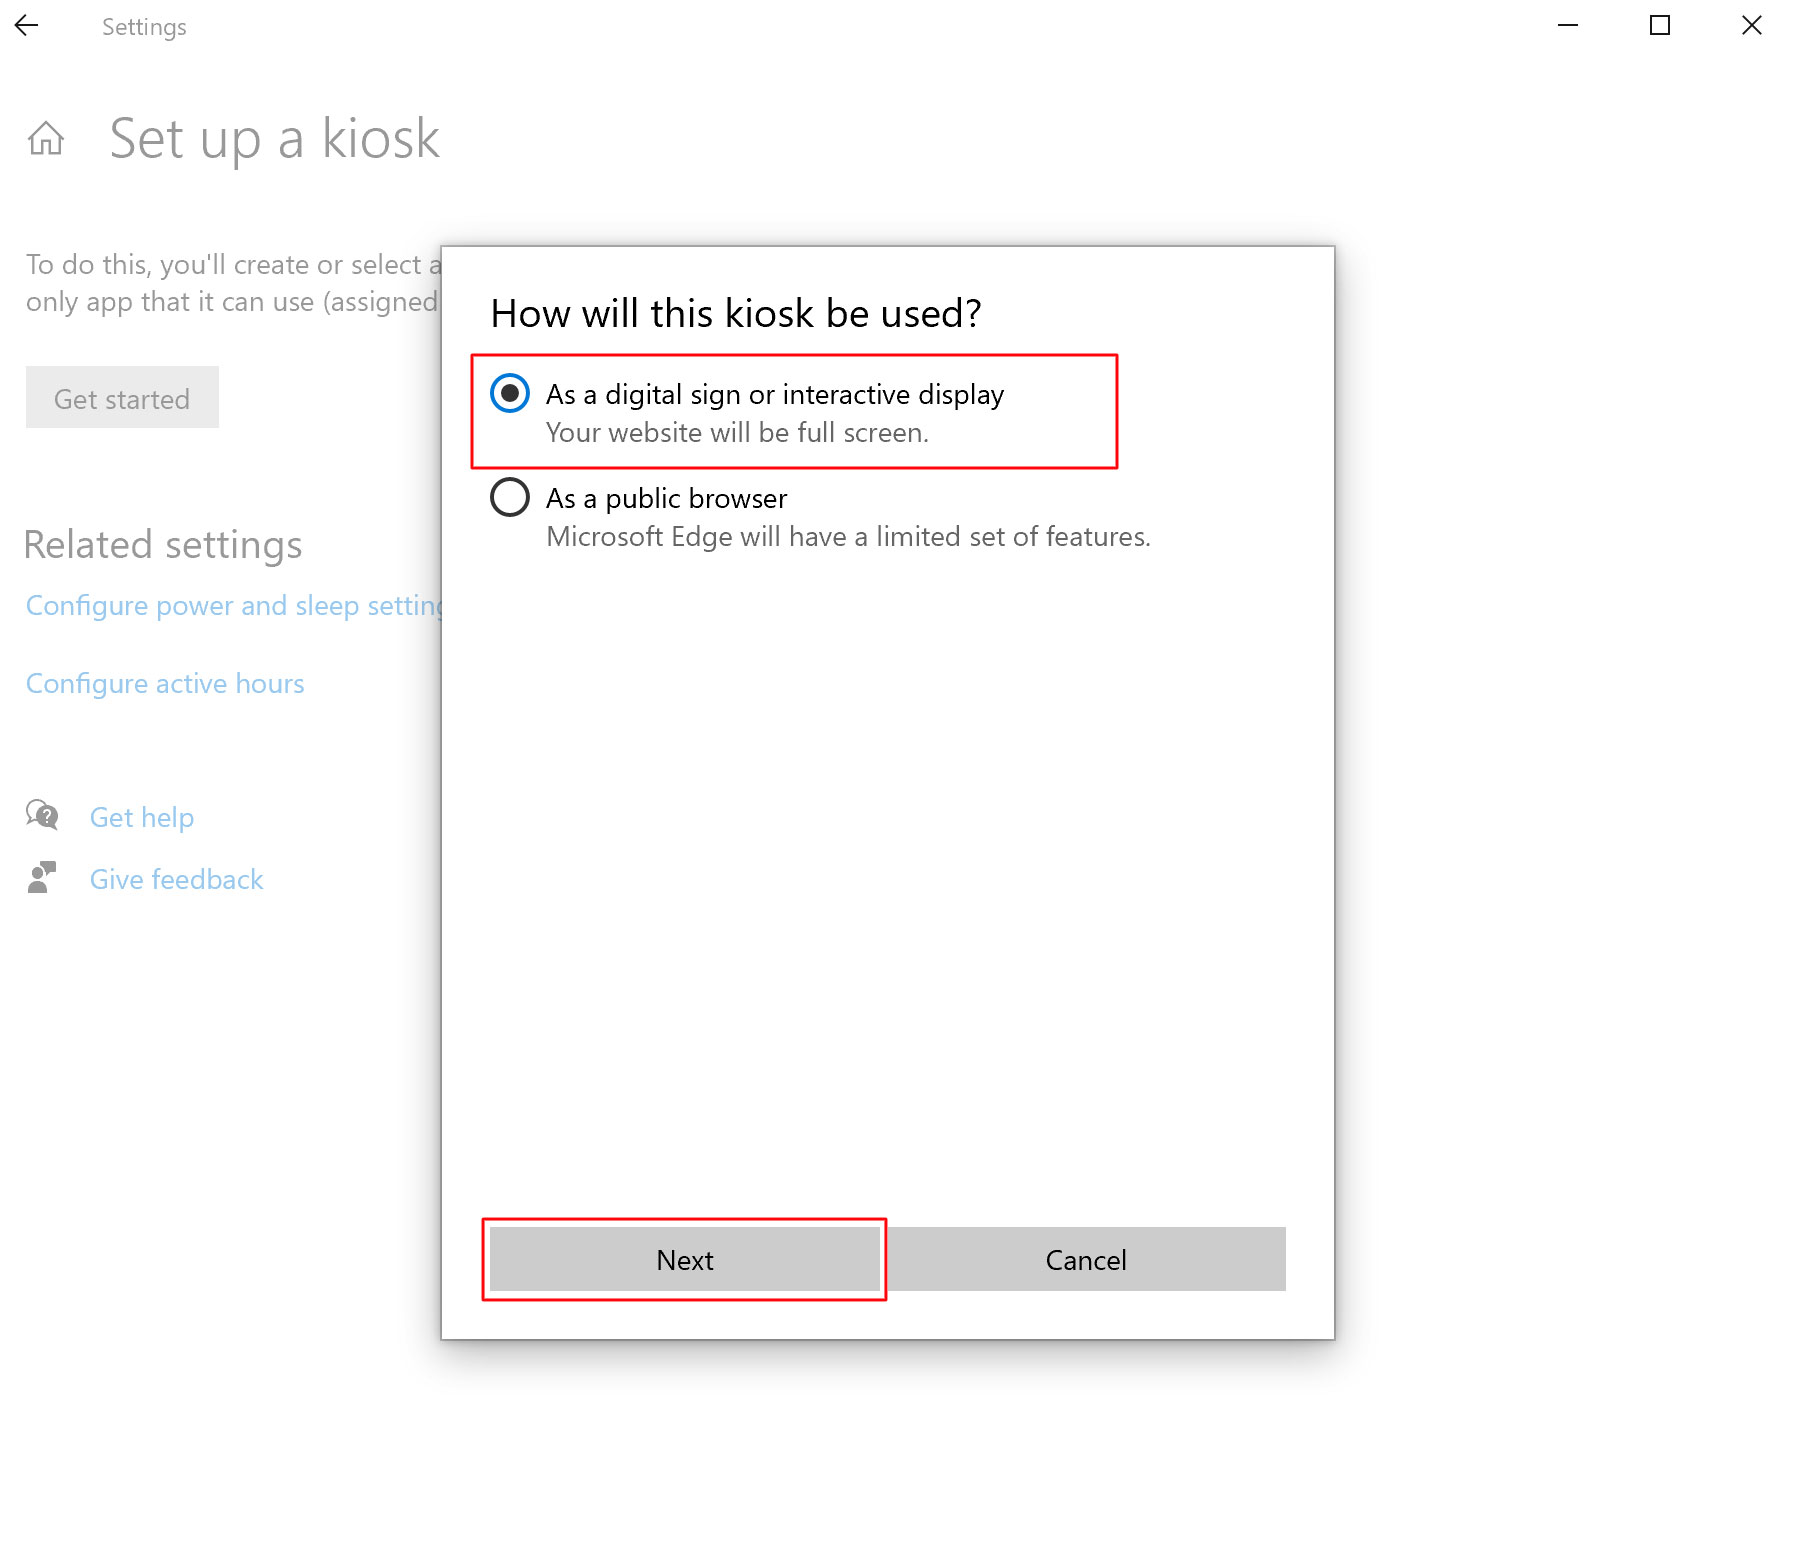
- Choose As a digital sign or interactive display for the How will this kiosk be used box, then hit Next.

Note: Keep this page open. You will insert the auto-login URL into this page after completing Step 2 below.
Retrieve your auto-login URL.
- Log in to viewspace.org with your email and password.
- Go to your ViewSpace User Profile by clicking on your name in the top right corner.
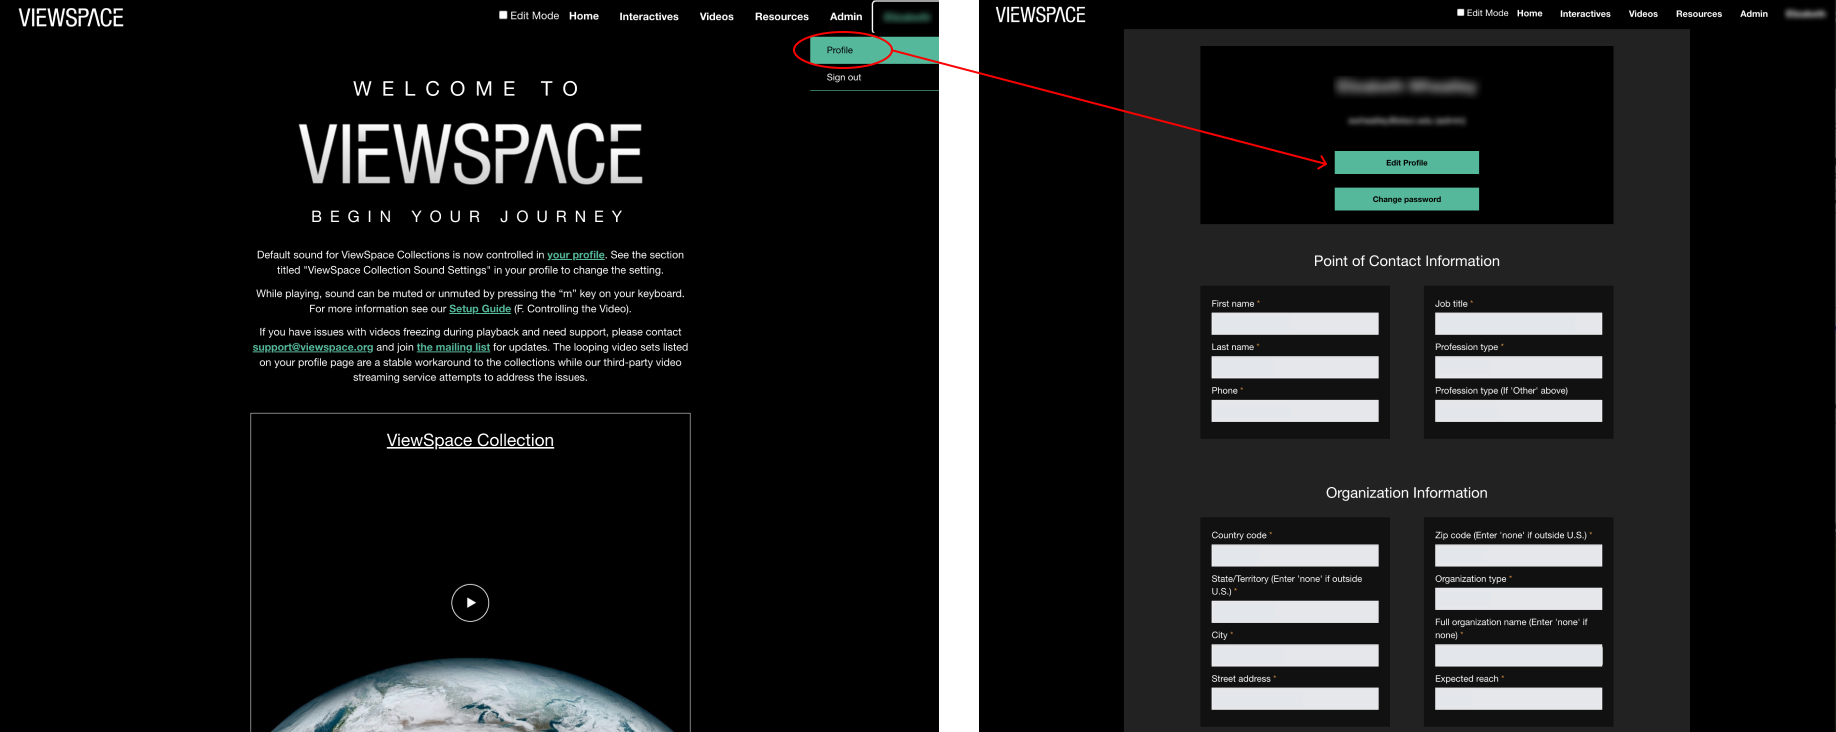
- Scroll down to the bottom of the profile page. Here you will find your auto-login URLs.
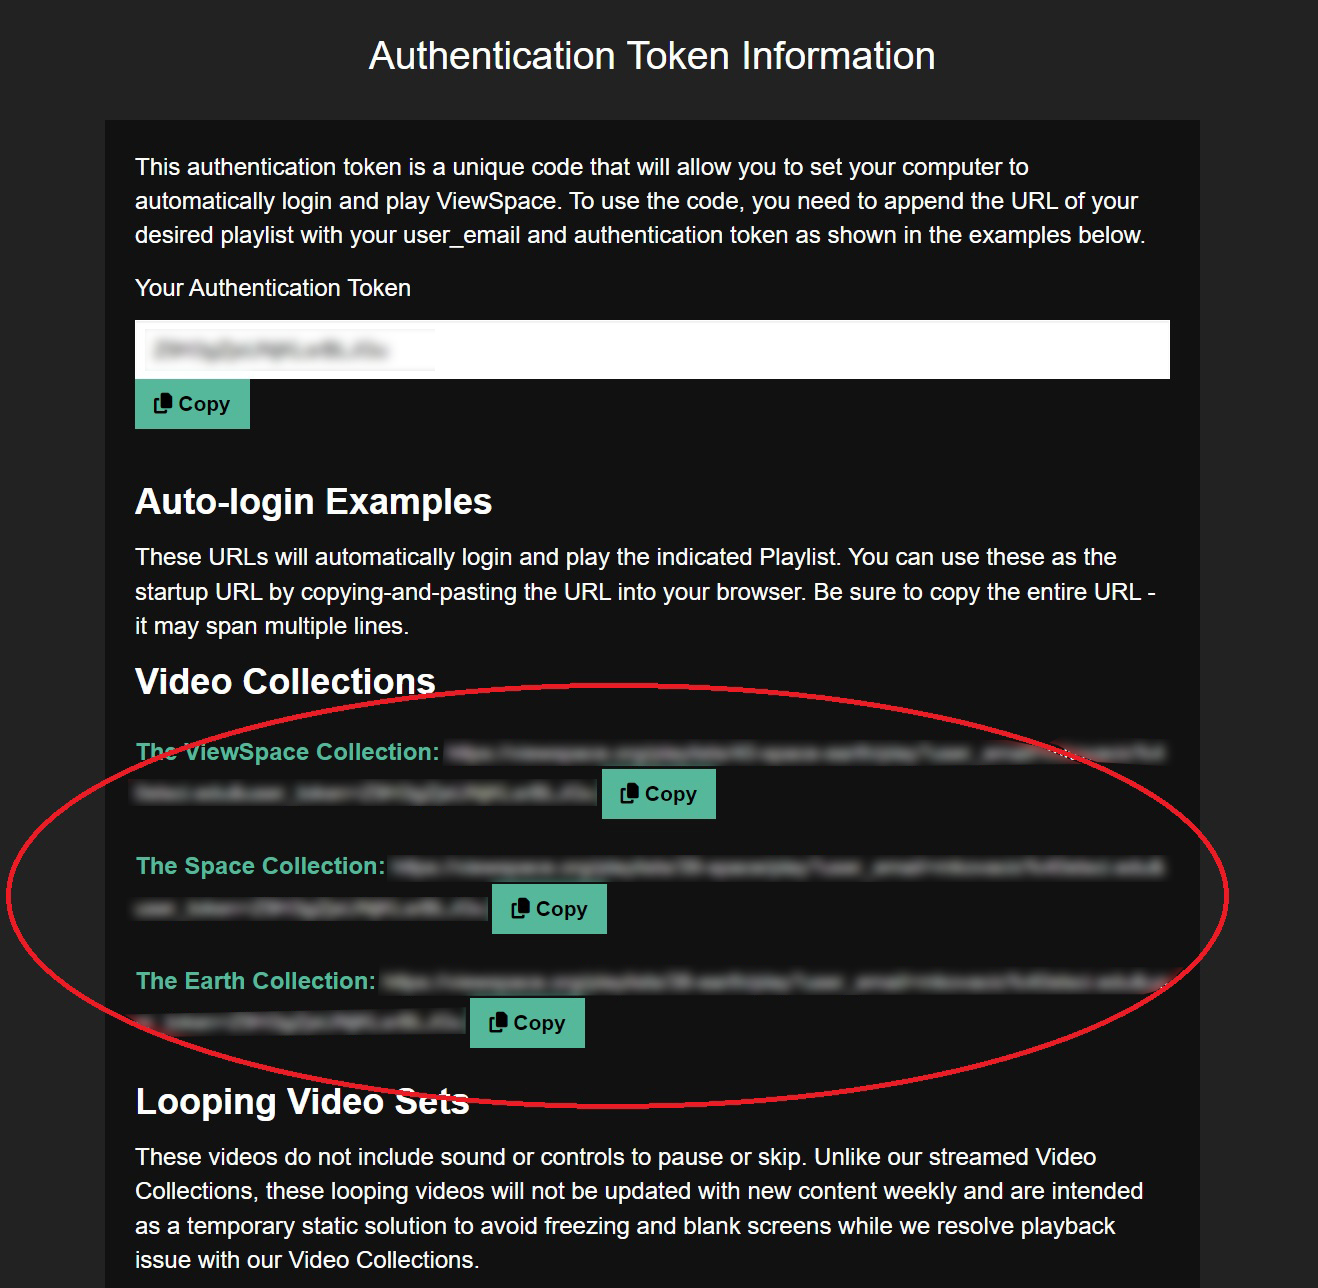
- Copy the auto-login URL of the video collection that you want to view. This URL includes your authentication token and is unique to you.
Paste your auto-login URL.
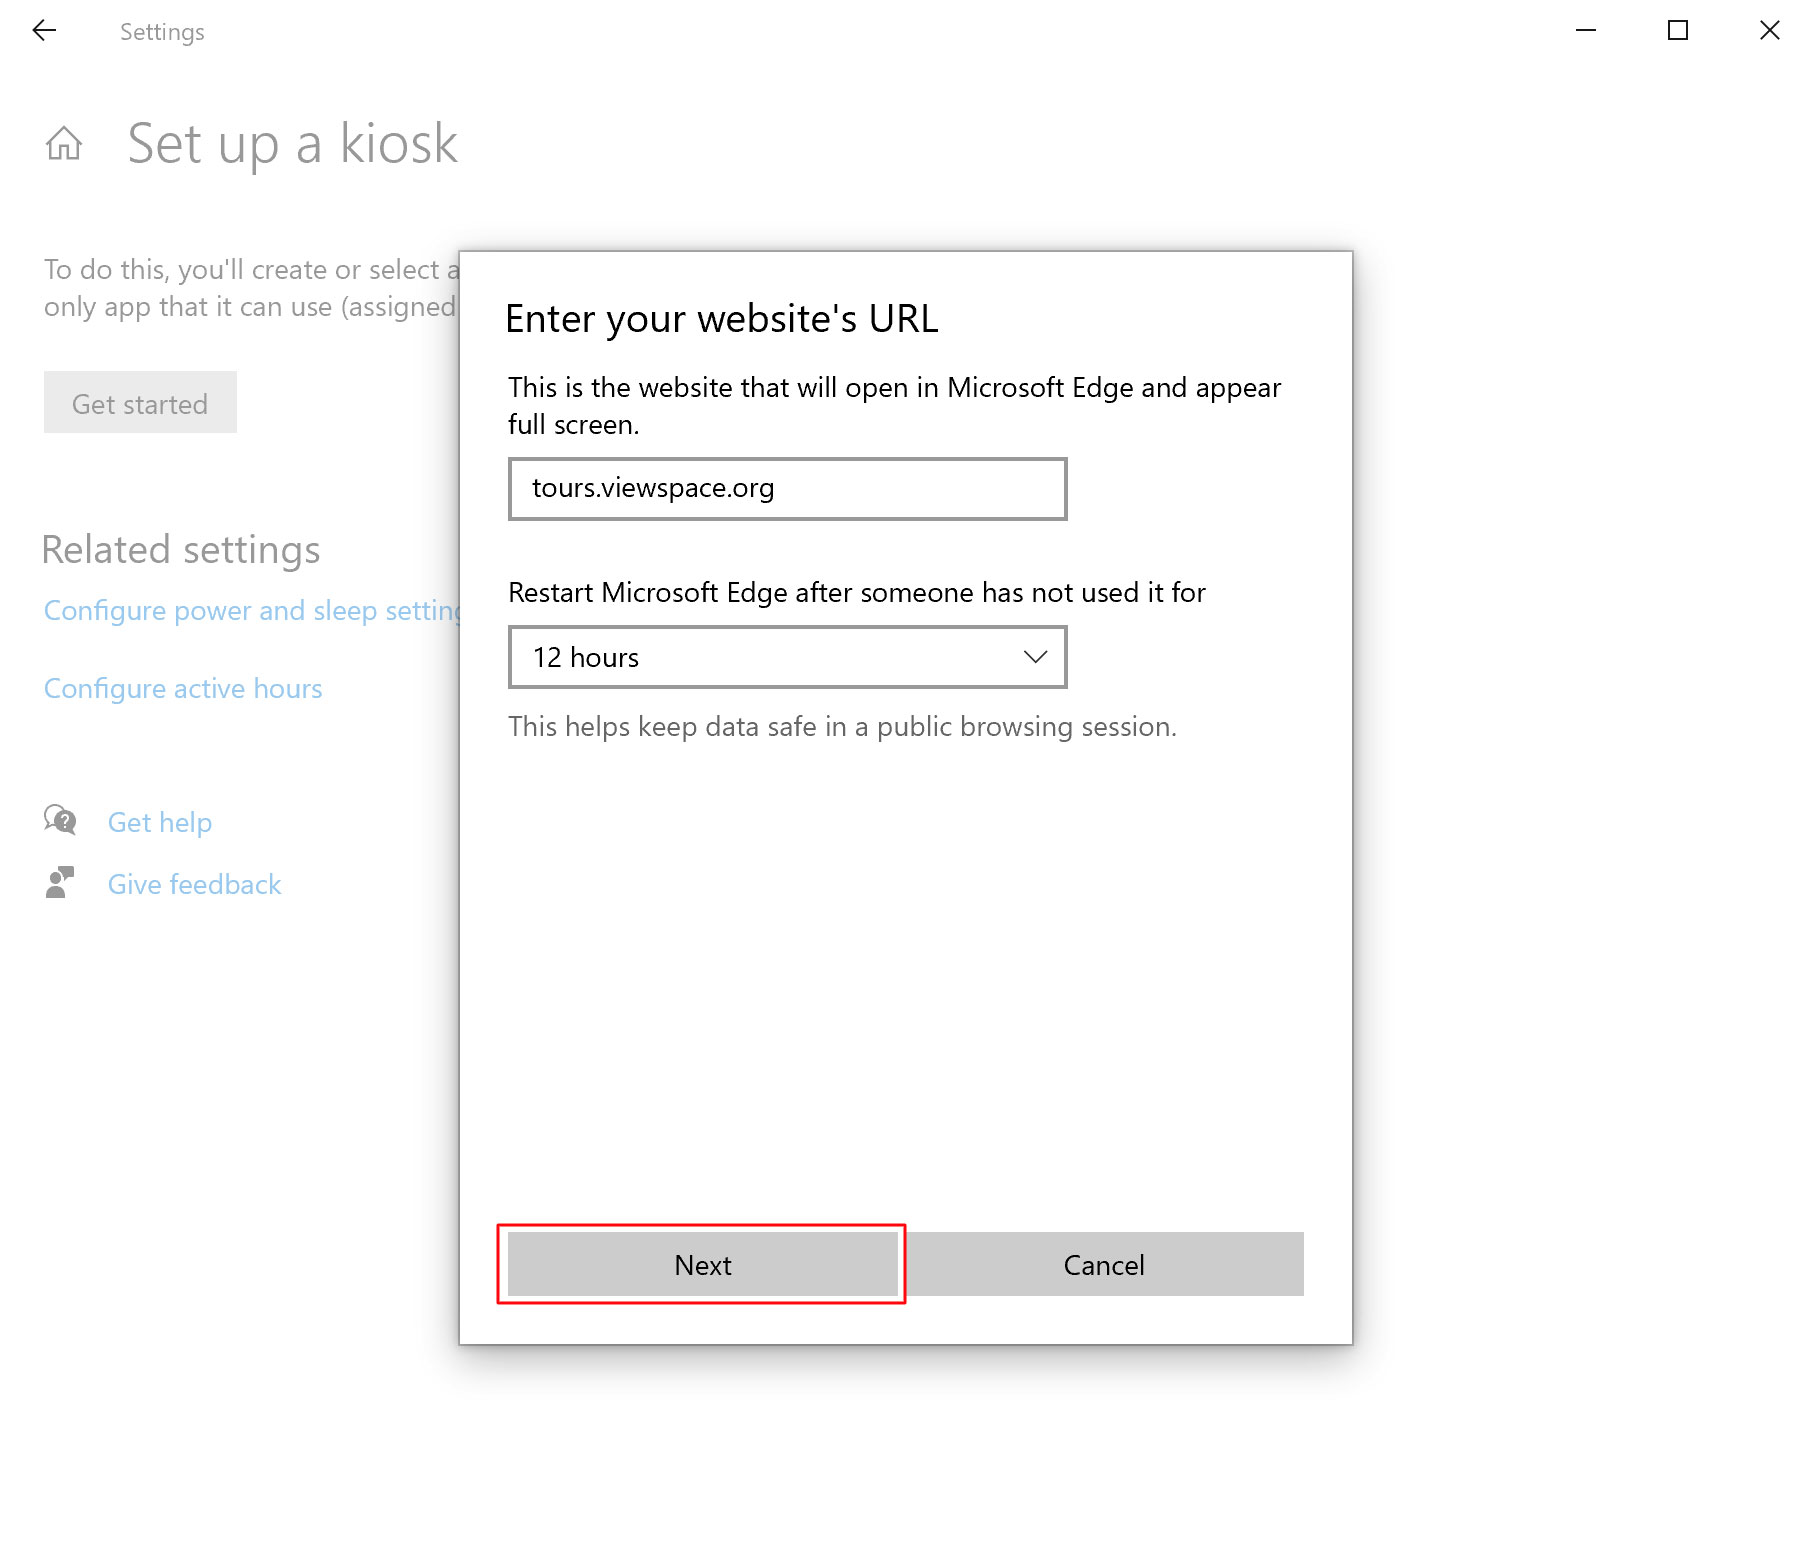
- Return to your Set up a kiosk page in the Settings on the Windows Start Menu, and paste the auto-login URL you chose from your ViewSpace account into the box below Enter your website’s URL.
- Change the Restart Microsoft Edge after someone has not used it for to 24 hours using the drop-down menu. Click Next at the bottom.

- You may now close the dialog box. When the computer is restarted it will now boot directly into your ViewSpace Kiosk. To exit kiosk mode press Ctrl+Alt+Delete.

Configuring your kiosk to play ViewSpace with sound on Windows.
In your ViewSpace profile, change your ViewSpace Collection sound setting to “Yes” and click “Update Sound”. See D. Enabling Sound (optional).
In order to play your Kiosk Mode with sound, you may need to update the Registry to allow for autoplay. This step is not necessary if you plan on playing ViewSpace without sound.
We are providing two methods of configuration, please choose to implement one method. An easy to run script is available for download or instructions are provided for manual configuration of the registry.
Note: You will need to use an Administrator account to complete these steps.
Option 1: Run the REG script
- Download the script, noting the local folder you download to. Download:
set_edge_autoplay.reg - In File Explorer, open the folder where you downloaded the script (likely your "Downloads" folder). We recommend you review this (human-readable) REG file.
- Double-click the
set_edge_autoplay.regfile to run it. - Click Run, in the Open File - Security Warning dialog box.

- Click Yes to the question Do you want to allow this app to make changes to your device?
- Click Yes in the dialog box asking if you "trust the source of this information".

- Click OK in the dialog box indicating the keys and values "have been successfully added to the registry."

- You can now restart ViewSpace in Kiosk Mode and it should play with sound.
Option 2: Manually edit the Registry:
- Open the Registry Editor Application
- Search for "Registry Editor" or
regeditin the Windows search bar and double-click to Open. - If you get a warning message: Do you want to allow this app to make changes to your device?, you can click Yes.

- Search for "Registry Editor" or
- Navigate to the Microsoft folder using the following path: "
HKEY_LOCAL_MACHINE/SOFTWARE/Policies/Microsoft"- Expand the folders to follow the path:
HKEY_LOCAL_MACHINE>SOFTWARE>Policies>Microsoft
- Expand the folders to follow the path:
- Confirm or create a new key named Edge under the Microsoft folder
- If you do not see an Edge folder under the Microsoft folder, you will need to create it.
- Right-click on the Microsoft folder, select New > Key, and name it Edge.

- Right-click on the Microsoft folder, select New > Key, and name it Edge.
- If you do not see an Edge folder under the Microsoft folder, you will need to create it.
- Under Edge, add an entry for AutoplayAllowed (if it does not exist)
- In the tree on the left, Right click on the Edge folder
- Choose New > DWORD (32-bit) Value
- Name the new entry: AutoplayAllowed

- In the tree on the left, Right click on the Edge folder
- Edit the AutoplayAllowed entry
- The AutoplayAllowed entry should have the following values:
- Type = REG_DWORD
- Data = 0x0000001 (1)
- To edit the entry:
- Double-click on the AutoplayAllowed entry.

- Enter the number 1 as the Value data. This will automatically be translated to the expected 0x0000001
- Ensure Hexadecimal is selected under Base.
- Click OK to accept and close.

- Double-click on the AutoplayAllowed entry.
- The AutoplayAllowed entry should have the following values:
- You can now restart ViewSpace in Kiosk Mode and it should play with sound.
Notes:
- The Registry Editor is not case-sensitive. Some of the items may have a different upper or lower case letters (e.g. "SOFTWARE" could be "Software"). This is ok but the spelling matters.
- Please use our specified case for any value you type.
- The folder we are editing should be called "Edge" not "MicrosoftEdge". There might already be a folder/key called "MicrosoftEdge" which can be left as is.
- This registry configuration will allow autoplay for all websites using Edge on this device, not just with use of ViewSpace.
Once you have signed up and logged in to ViewSpace, you can control a video while it is playing by using the keys listed in the following table. To use the keyboard controls, you must interact with the video. To do this, click on the video or tab to the video using your keyboard.
| To | Press |
|---|---|
| Pause/Play | space bar |
| Toggle full-screen | F |
| Toggle mute on and off | M |
| Increase volume | ↑ |
| Decrease volume | ↓ |
| Skip forward | → |
| Skip back | ← |
Some sites have reported issues with streaming ViewSpace videos. If you are experiencing issues with the video collections, such as the video freezing on the title screen, we encourage you to try the following:
- Click within the video window and then hit the space bar to continue playing content.
- Or, switch your kiosk to use one of our looping video sets.
Looping video sets were created to avoid issues some users have experienced.
- At the bottom of your ViewSpace User Profile, you will find a 130-minute-long playlist under the “Looping Video Sets” section called “ViewSpace Highlights (about 2 hours).” The ViewSpace Highlights playlist is composed of selections from the Space and Earth playlists, and includes a mix of longer and shorter form content to better represent the full breadth of ViewSpace.
- Additionally, there are five themed looping video sets available that range from 13 to 25 minutes in length. These themed looping video sets focus on the following topics: (1) Agriculture, (2) Freshwater, (3) Light and Distance, (4) Shadows, and (5) Star and Planet Formation.
- To play a looping video set, copy and paste the respective URL into your browser. The series of videos will play in full-screen mode and loop automatically.
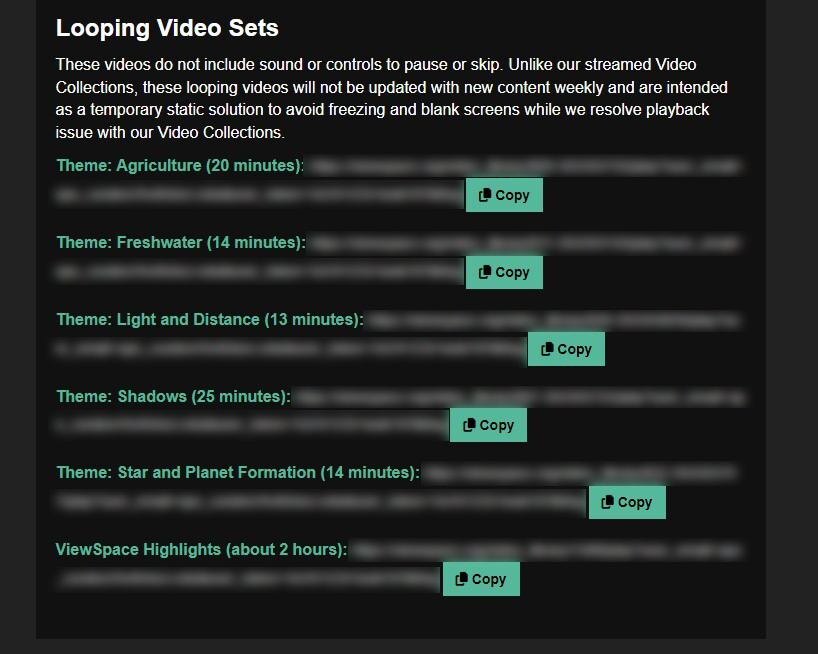
Note: Looping video sets do not include sound or controls to pause or skip. Unlike our streamed video collections, these looping videos will not be updated with new content weekly and are intended as a temporary solution to avoid freezing and blank screens while we resolve streaming issues with our video collections.
If you still experience issues after trying these fixes, please contact ViewSpace support (support@viewspace.org). Stay informed about ViewSpace updates, new features, and fixes by joining our mailing list.
Installing ViewSpace’s Interactive Apps
ViewSpace’s free Interactive Apps provide direct access to the complete library of ViewSpace’s interactives from a tablet’s home screen or a computer desktop. The device can be locked using Kiosk Mode (on Windows devices), Guided Access (on iPadOS devices) or pinning (on Android devices) to prevent users from navigating away from the Interactives Library to access other sites, apps, or functionalities, making the app ideal for use as an interactive kiosk or during informal education programs. There are two apps, one to access the Image Tours and one to access the Image Sliders.
To install the Interactive Image Tours App, navigate to https://tours.viewspace.org/ and follow the instructions for your device below.
To install the Interactive Image Sliders App, navigate to https://sliders.viewspace.org/ and follow the instructions for your device below.
Note: The images in this section illustrate the steps for installing ViewSpace’s Interactive Apps using three different devices. However, you can follow similar steps using almost any device and browser combination to install the apps.
Installing the App on a Desktop
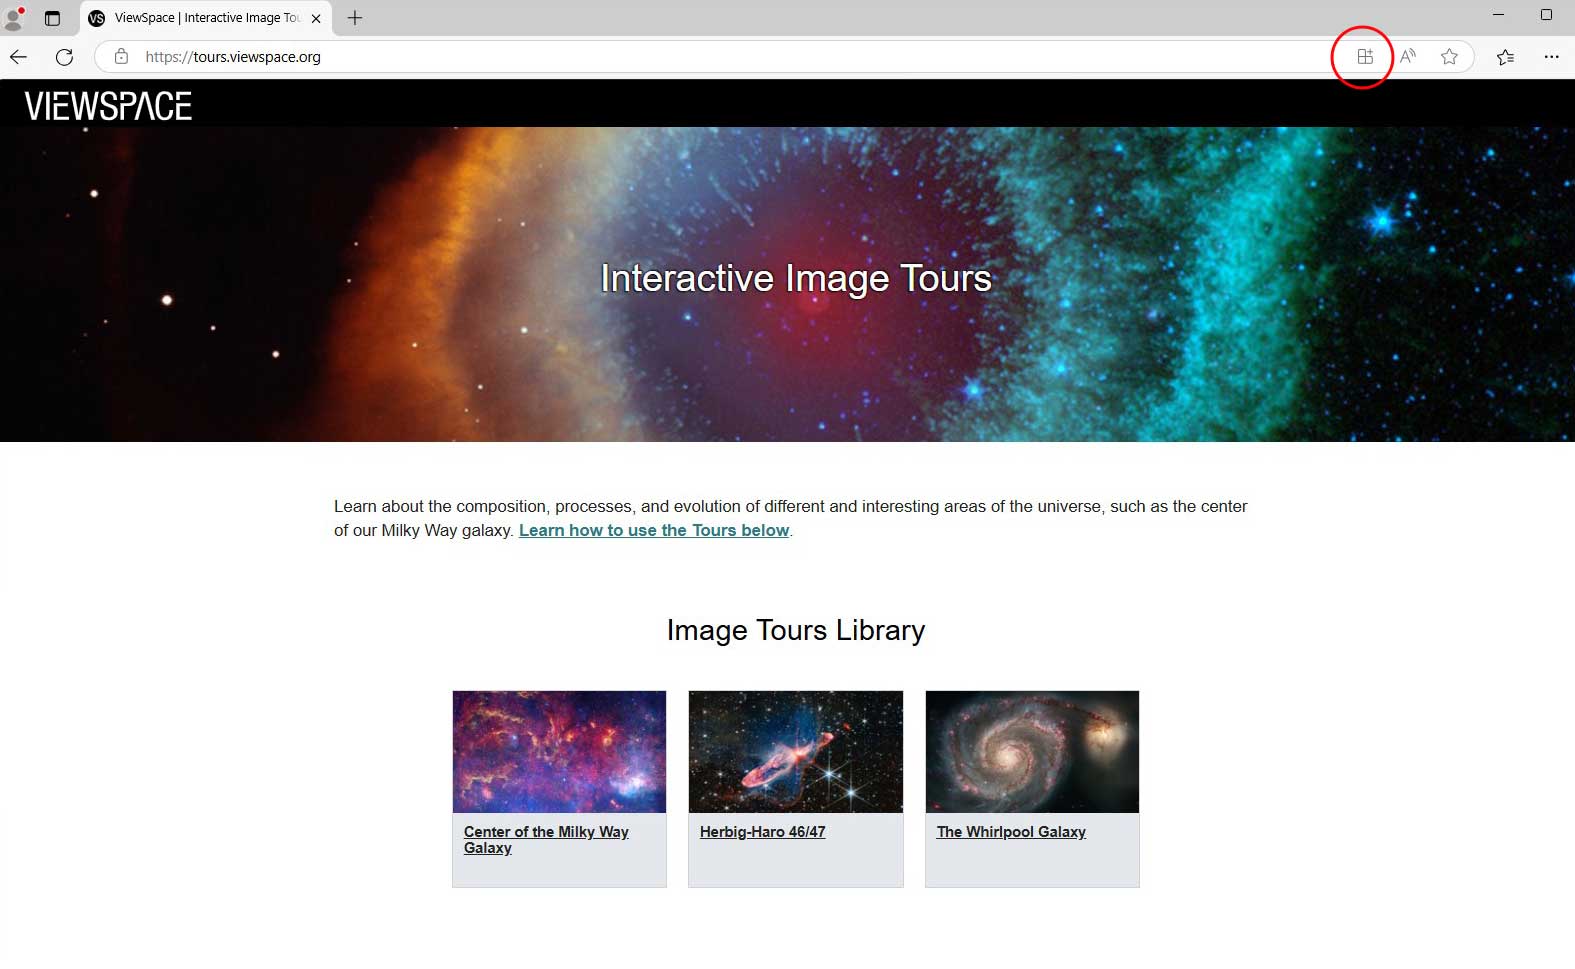
- To install the Interactive Image Tours App, open Microsoft Edge and navigate to https://tours.viewspace.org.
To install the Interactive Image Sliders App, open Microsoft Edge and navigate to https://sliders.viewspace.org. - At the right end of the address bar, click on the grid-like icon. The text “App
available. Install ViewSpace Tours/Sliders” appears when the cursor is hovered
over the icon.
- Click Install.
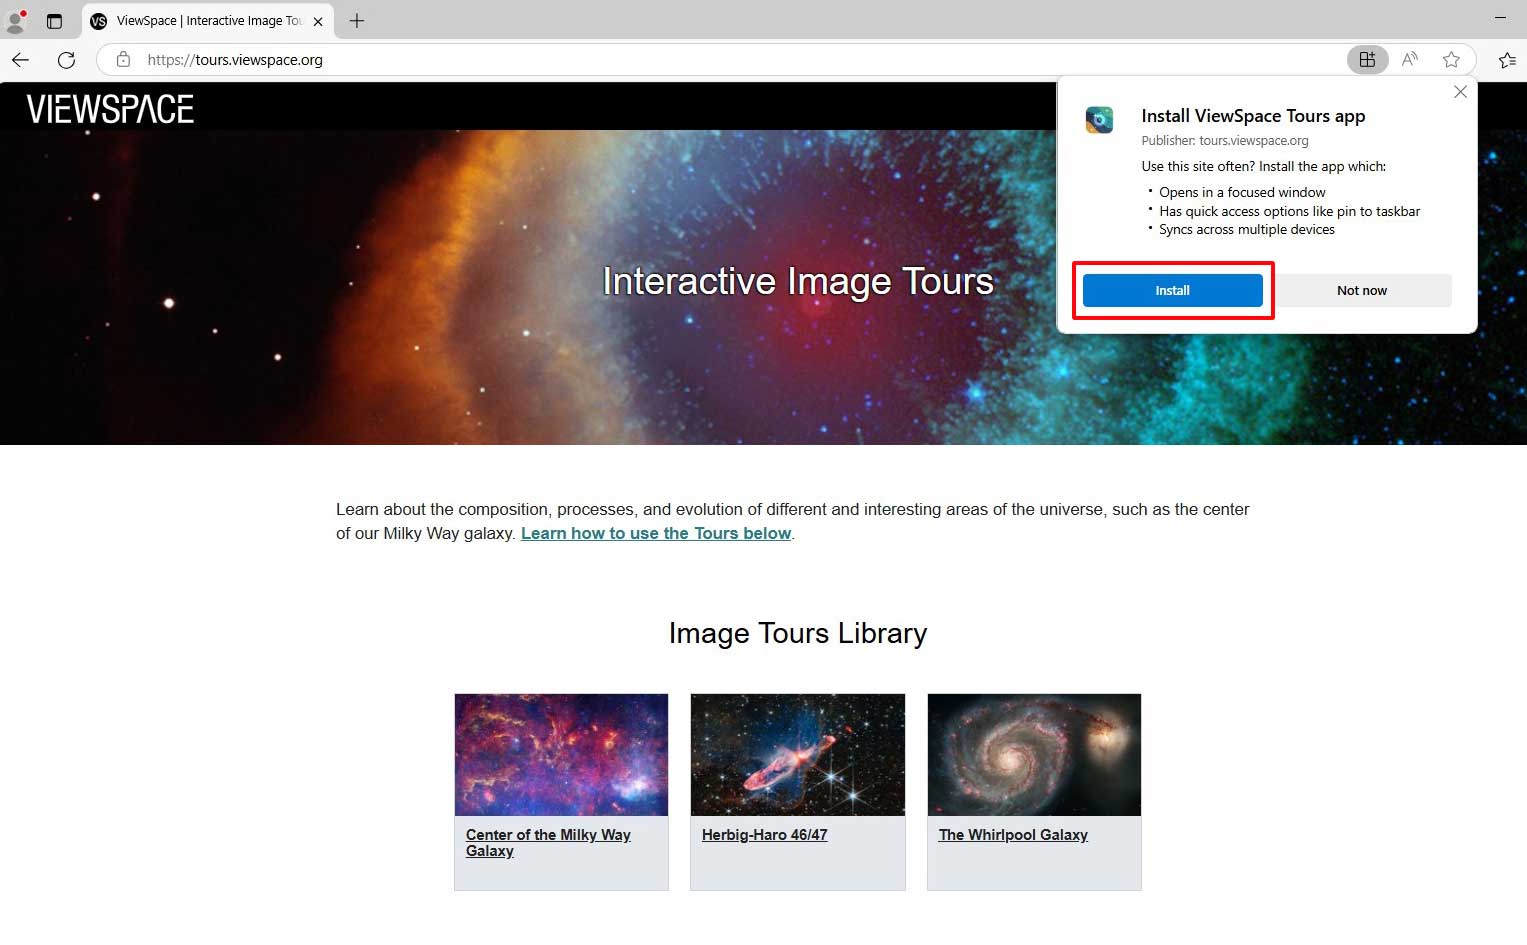
- Click Allow after selecting your preferred options:
- You can allow this app to be pinned to your taskbar.
- You can allow this app to create a desktop shortcut.
- You can allow this app to auto-start on login.
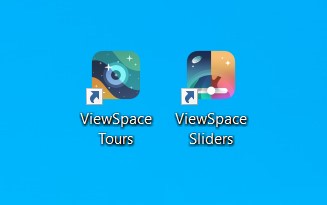
The next time you access the website in Microsoft Edge, the grid-like icon will be replaced with a linked button labeled “Open in app".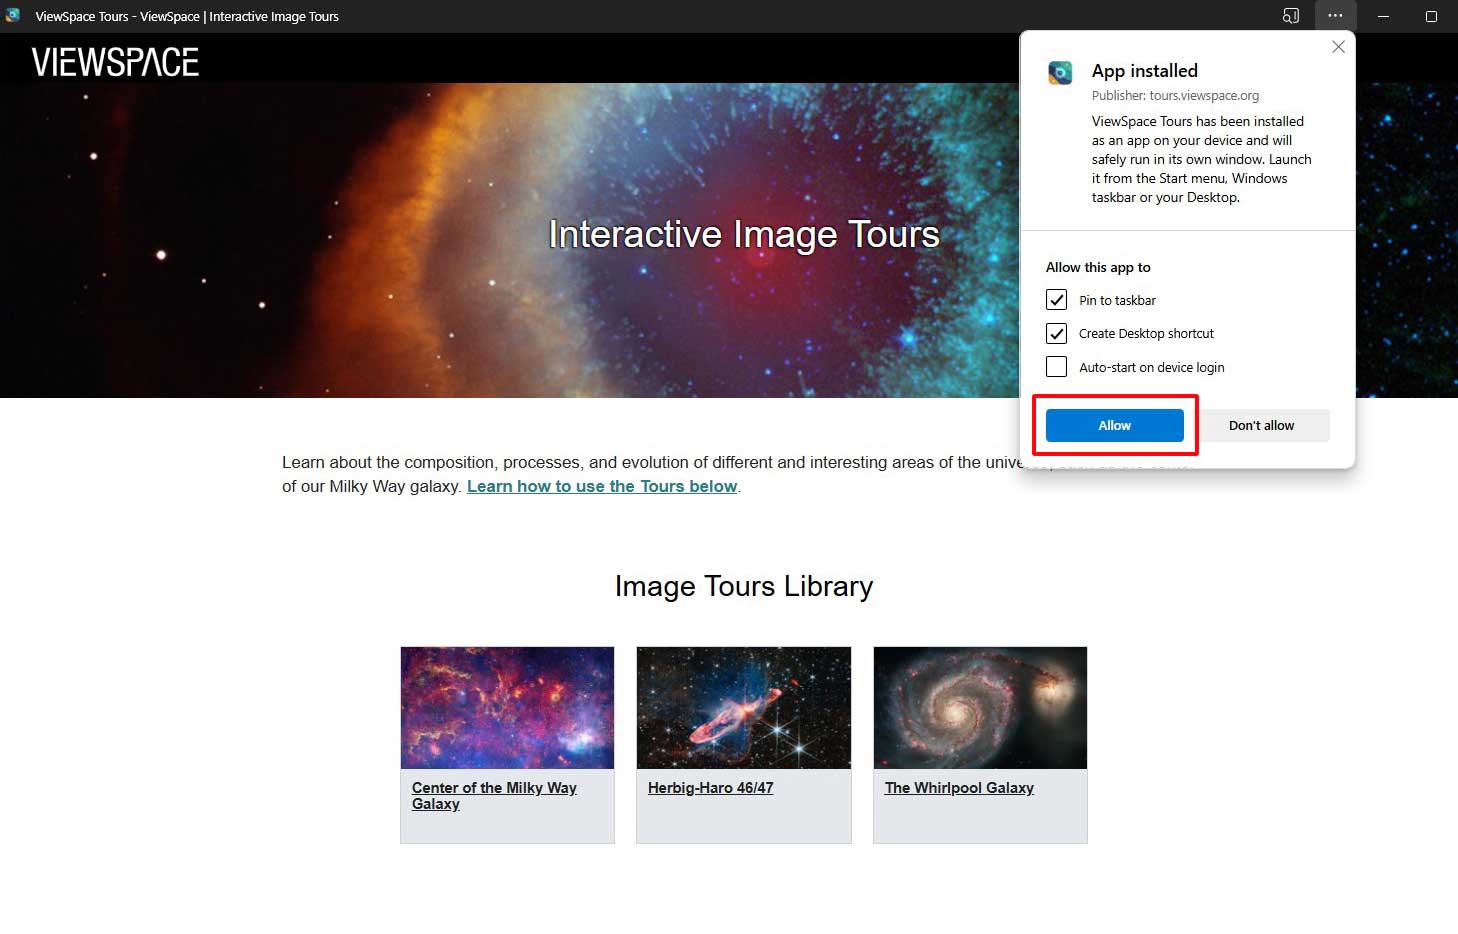
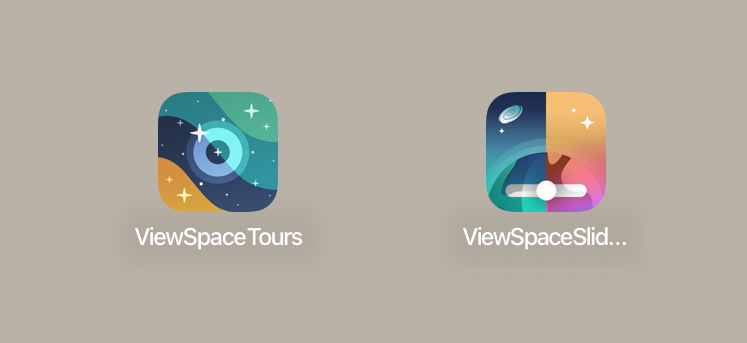
- Depending on which app you chose to install, one of these two icons will
bring you to the app. To secure the app, follow the instructions below.
Securing the App on a Desktop
Following similar instructions to Playing Video Collections Automatically in Kiosk Mode, you can set your Windows device to automatically open the app on start up.
- Open the Settings on the Start menu.
- Click on Accounts.
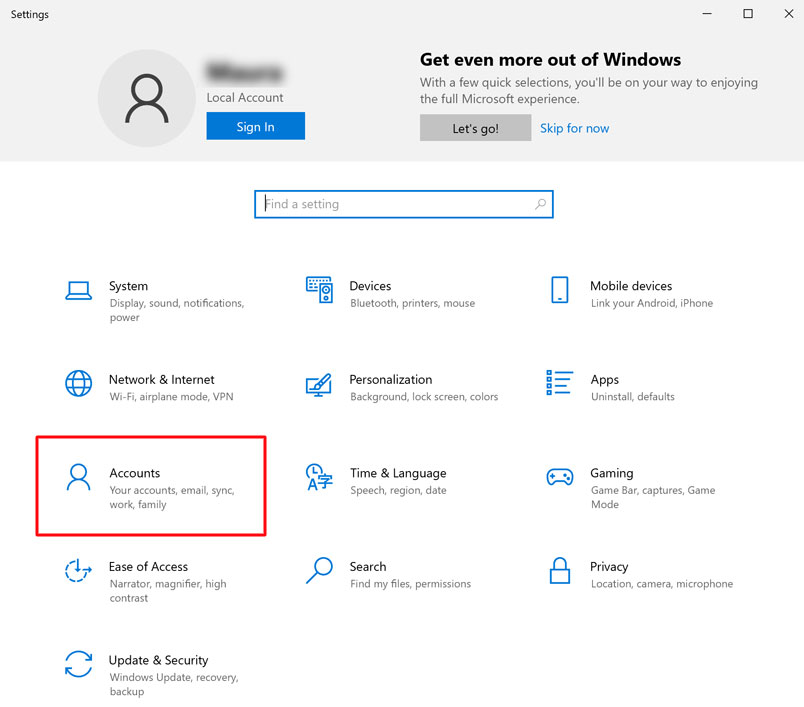
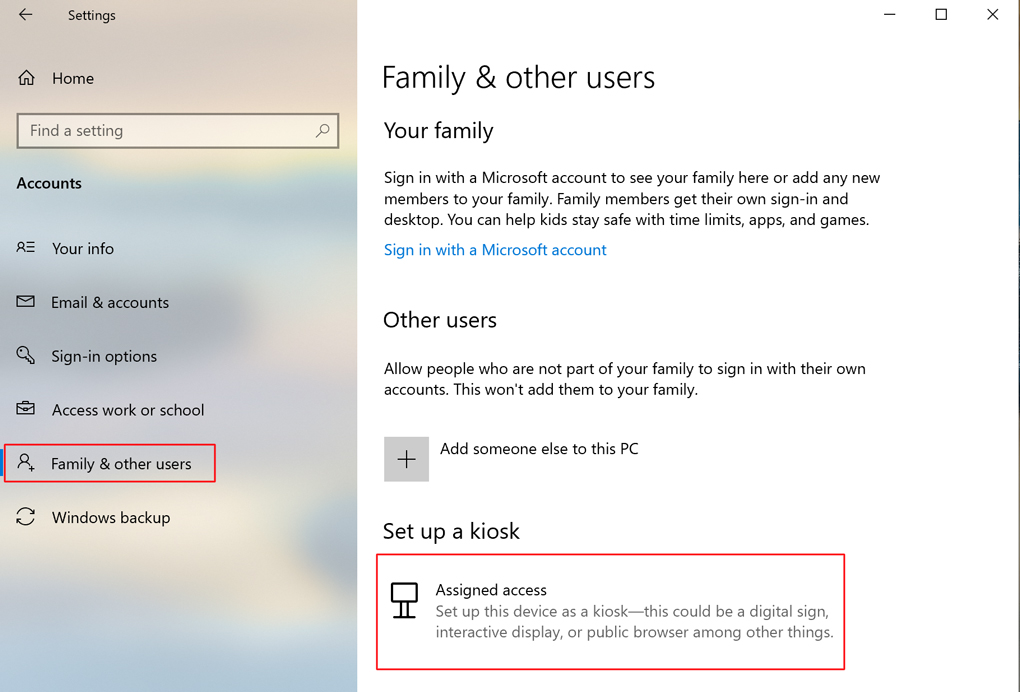
- Select Other users or Family & other users. Then click Assigned
access under the Set up a kiosk section.
 Note: If you don’t see an “Other users” or “Family & other users” account, please reach out to your organization’s IT department.
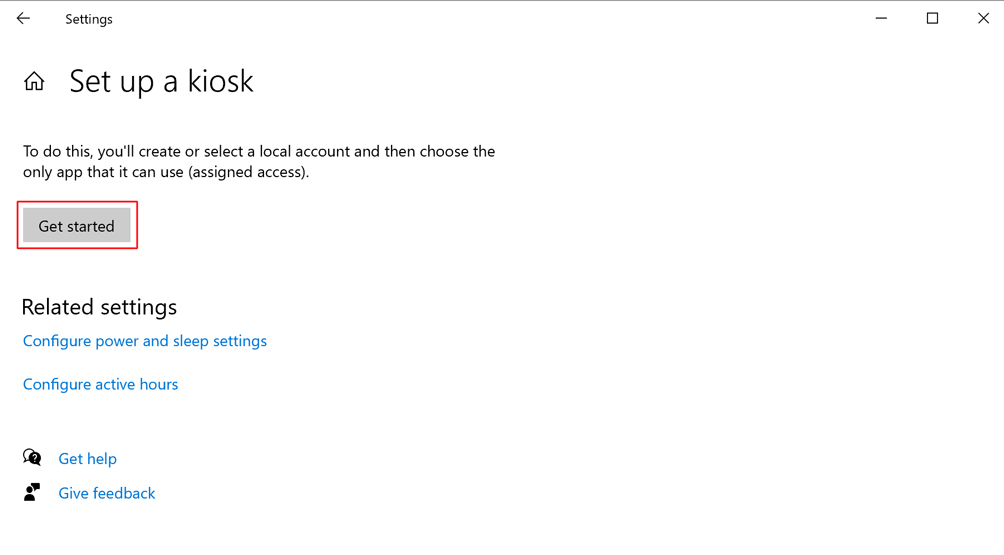
 - Click Get Started.
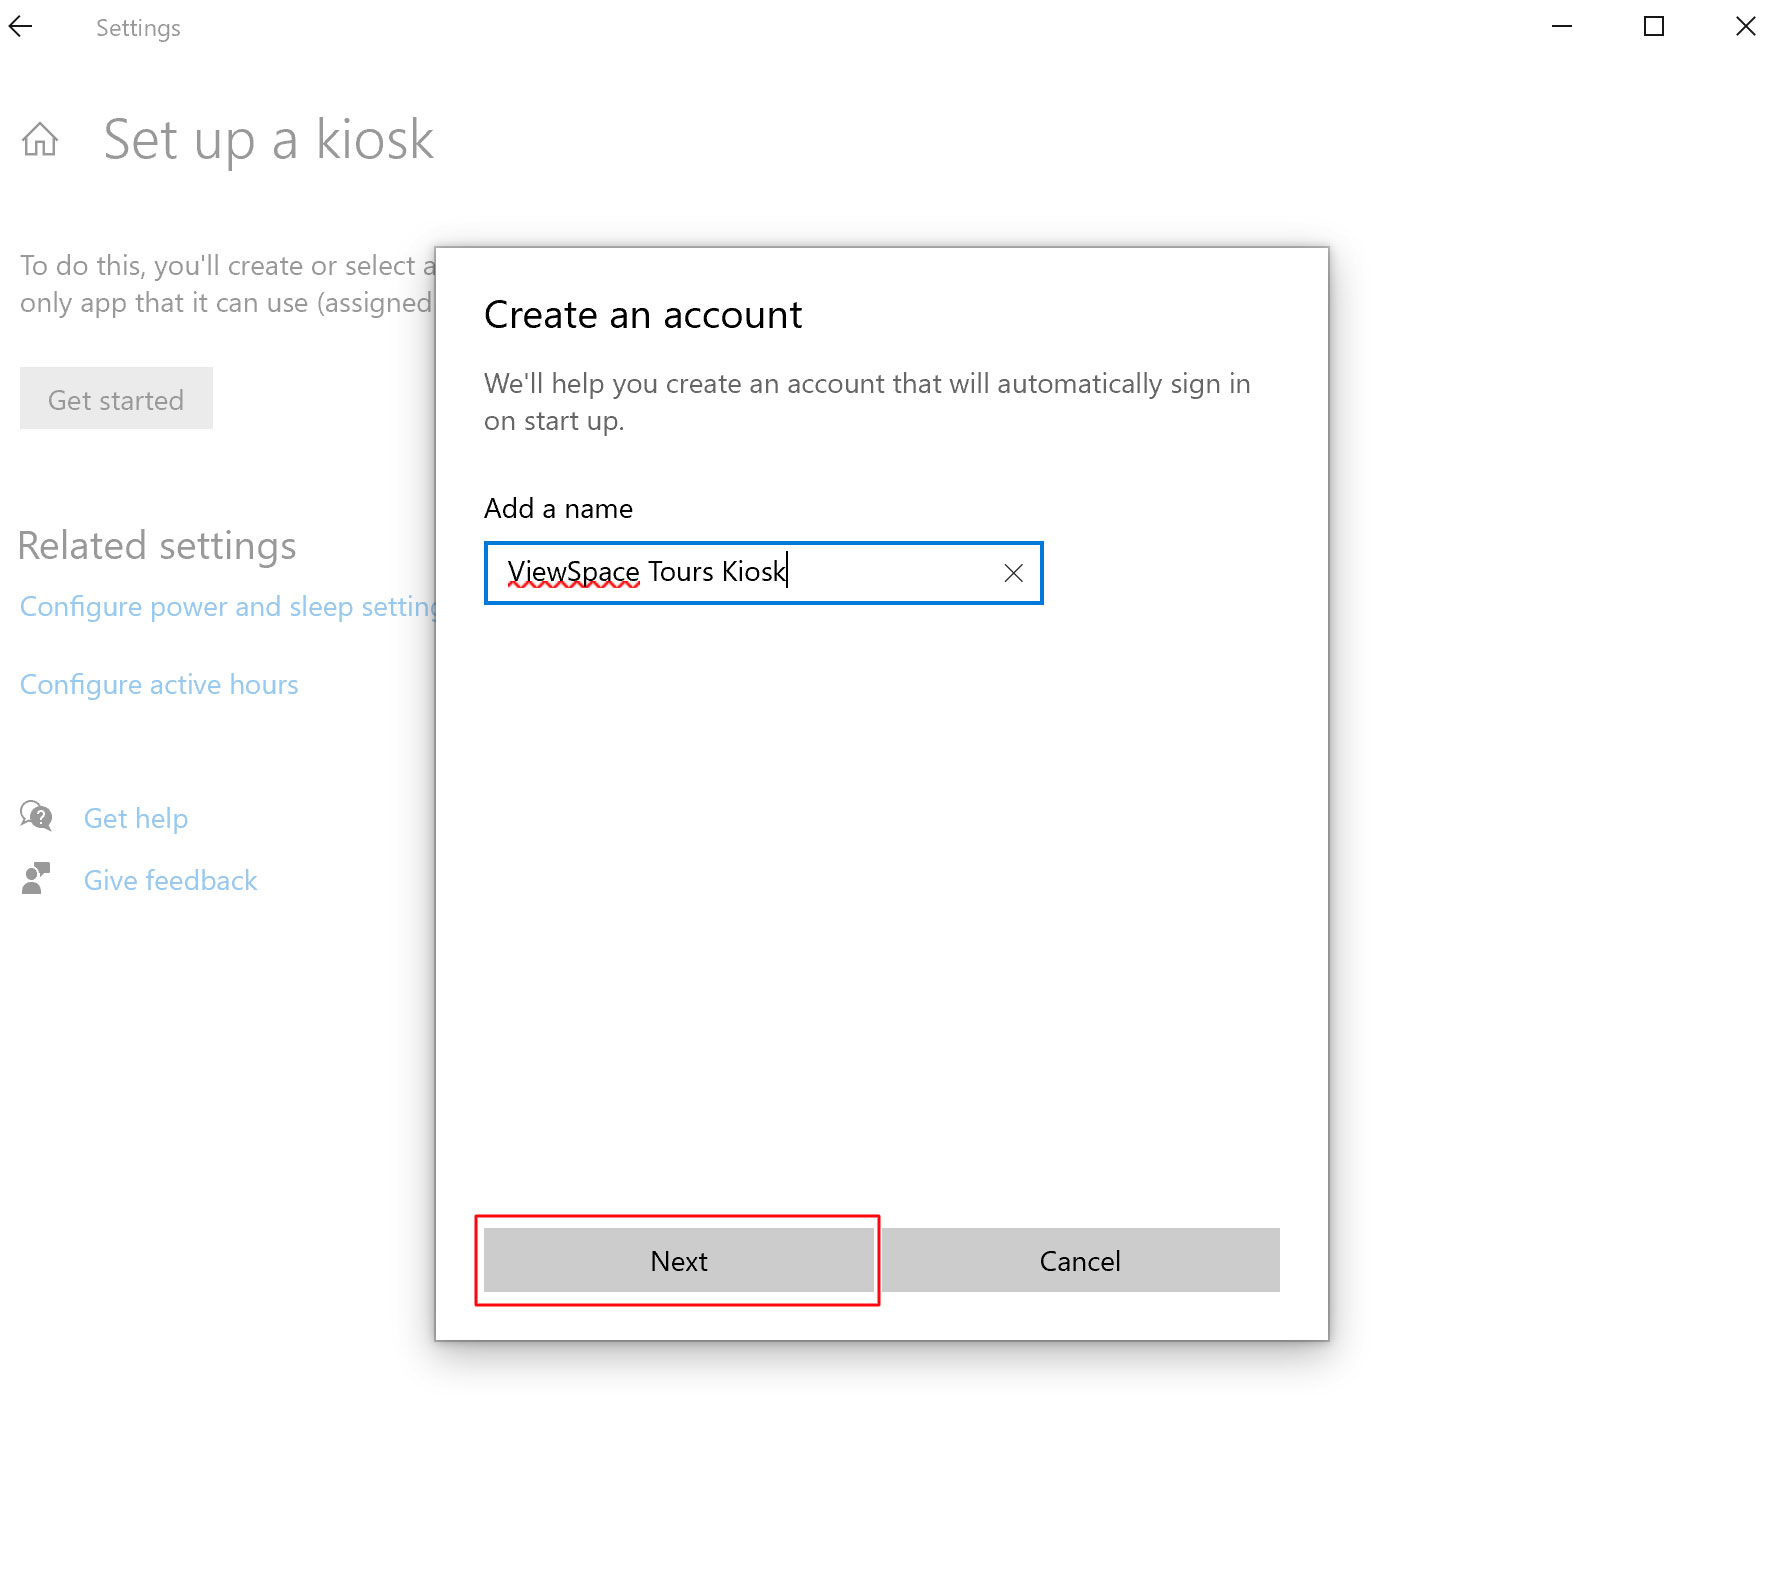
- Enter the name you wish this kiosk account to have in the Add a name field,
then click Next at the bottom.
- Choose the app you would like to use to run ViewSpace (Microsoft Edge in this case).
- Select As a digital sign or interactive display under How will this kiosk be used?
- Enter https://tours.viewspace.org or
https://sliders.viewspace.org into the box
below Enter your website’s URL. Change the Restart Microsoft Edge after
someone has not used it for to “12 hours” using the drop-down menu.
Click Next at the bottom.
- You’re done! To use this device as a kiosk, sign in with the account you just created. To exit kiosk mode, press Ctrl+Alt+Delete.
Installing the App on an iPadOS Tablet
- To install the Interactive Image Tours App, open Safari and navigate to https://tours.viewspace.org.
To install the Interactive Image Sliders App, open Safari and navigate to https://sliders.viewspace.org. - Click on the share icon, which is located either at the top or bottom of the screen.
The icon resembles a box with an arrow emerging from the top.
Then click Add to Home Screen. This will install the app to the device.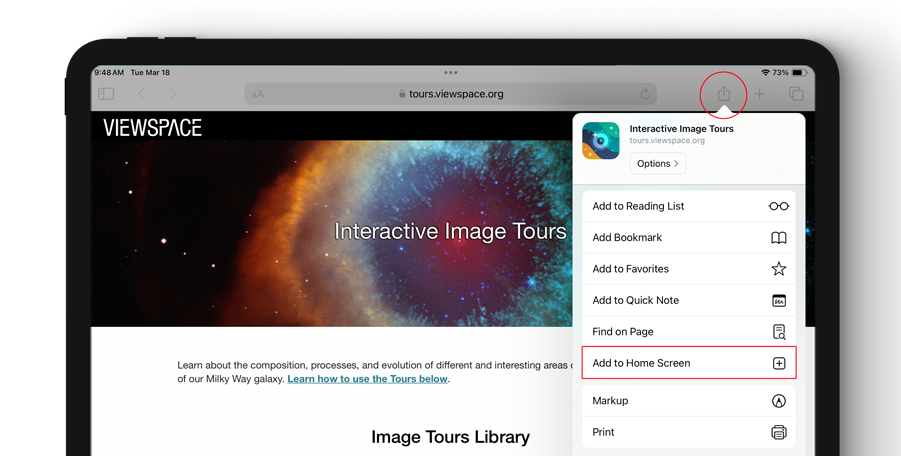
- Click Add.

- Depending on which app you chose to install, one of these two icons will
appear on your Home screen. To secure the app, follow the instructions below.
Securing the App on an iPadOS Tablet
To prevent users from navigating away from the app to other websites or applications when using your iPadOS device as an interactive kiosk or during programs, you can set up Guided Access.
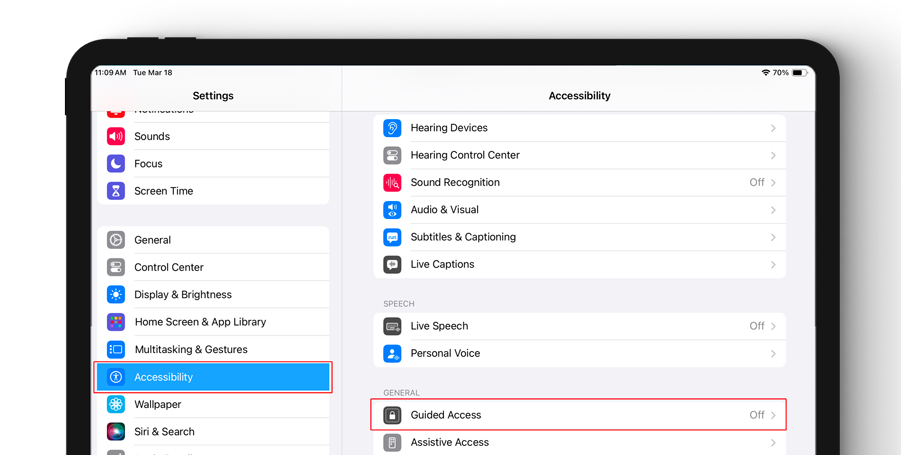
- Open the Accessibility menu within Settings, and click on Guided Access.
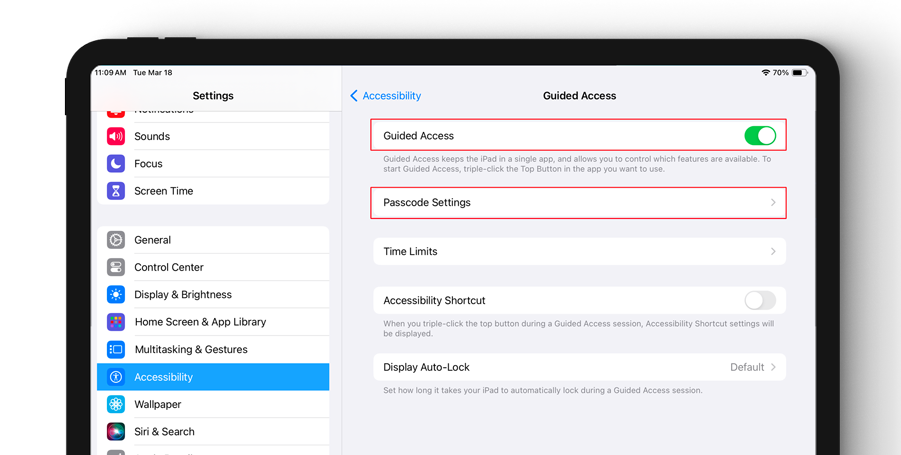
- Toggle on Guided Access and follow the instructions to set up a passcode.
 Note: Guided Access will apply to all of your apps, not just ViewSpace.
- Open the image tours or image sliders app.
- Triple-click the Home or lock button.
- To turn off Guided Access on an iPadOS device, you can do any of the following:
- Triple-click your device’s side or Home button and enter the Guided Access passcode you created.
- On an iPad or iPhone with Face ID turned on, you can double-click your device’s side button and use Face ID to unlock the screen.
- On an iPad or iPhone with Touch ID turned on, you can double-click your device’s Home button and use Touch ID to unlock the screen.
Installing the App on an Android Tablet
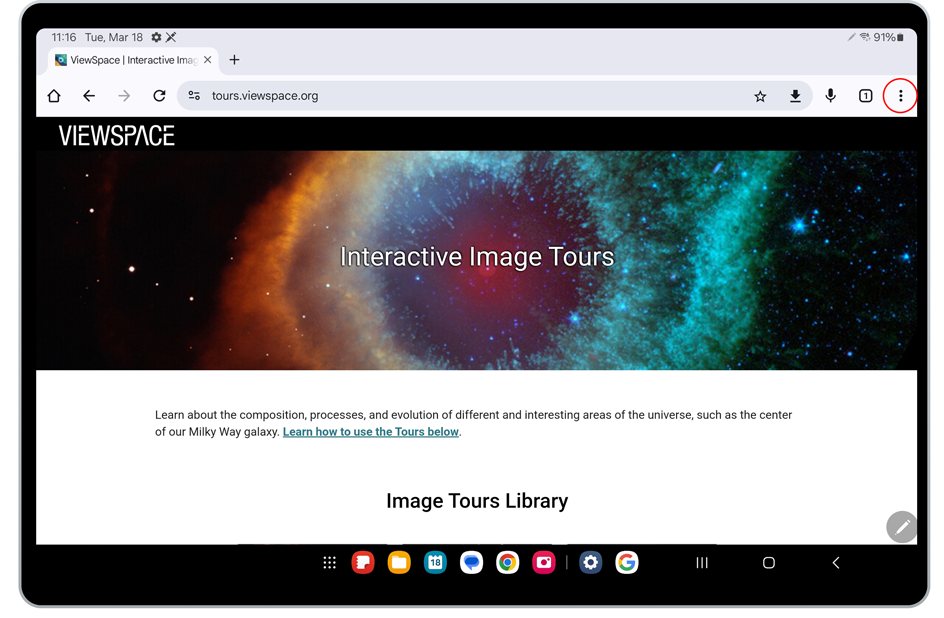
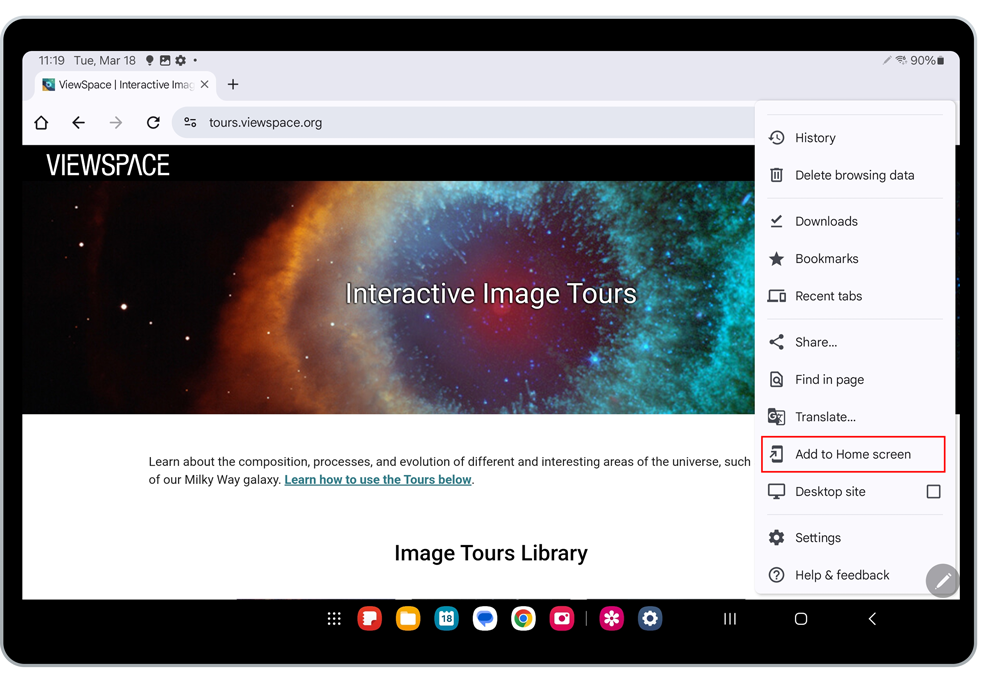
- To install the Interactive Image Tours App, open Google Chrome and navigate to https://tours.viewspace.org.
To install the Interactive Image Sliders App, open Google Chrome and navigate to https://sliders.viewspace.org. - At the right end of the navigation bar, click on the three vertical dots icon. From
the resulting drop-down menu, select Add to Home screen.
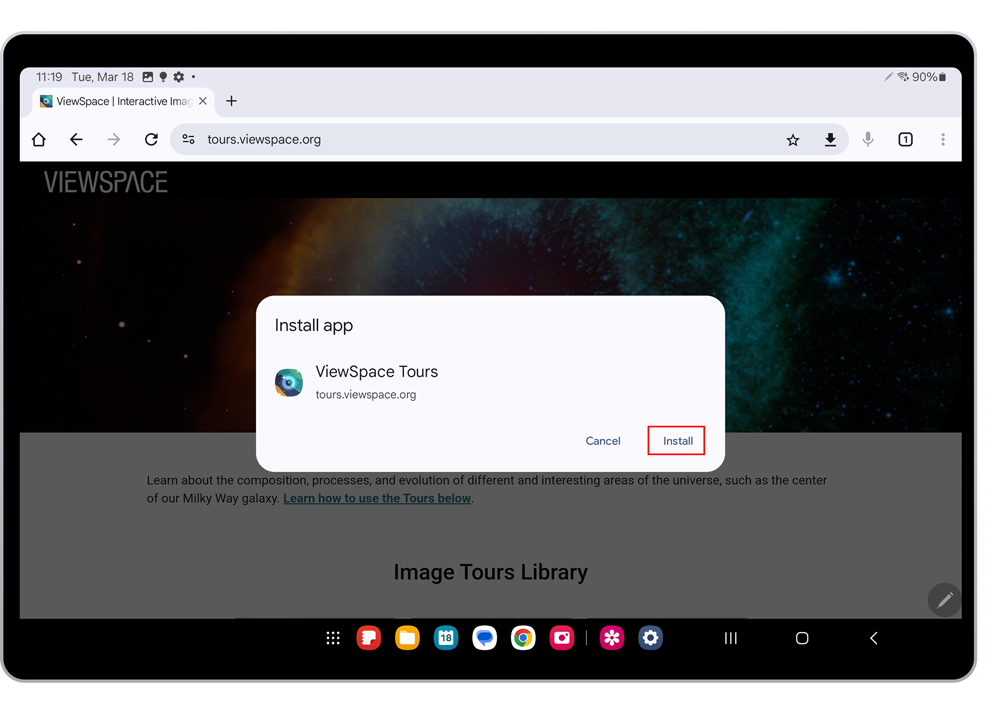
- Click Install. A pop-up may appear that asks if you’d like to view the installed application or if you want to add it to your Home screen. Click Add.
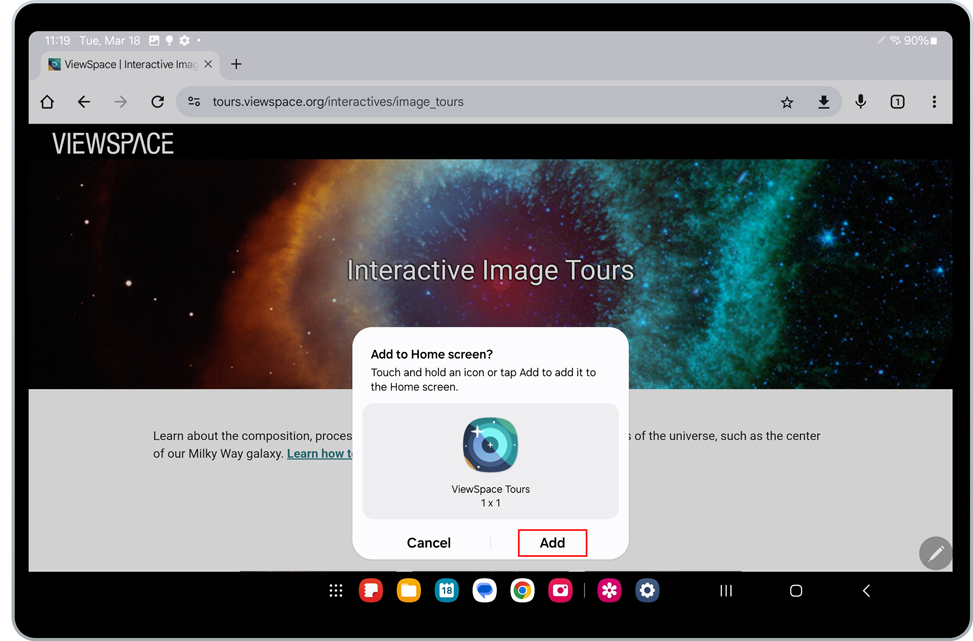
- The app icon should now appear on your Home screen. To secure the app, follow the instructions below.

Securing the App on an Android Tablet
If you’d like to set up an Android tablet device for use during public programs or as an interactive kiosk, follow these instructions to pin the app so users can’t navigate away from the app.
Note: “Pinning” is Samsung Galaxy Tab S8’s version of Guided Access. Other manufacturers may have their own built-in version or may allow you to download third party applications that fulfil the same function.
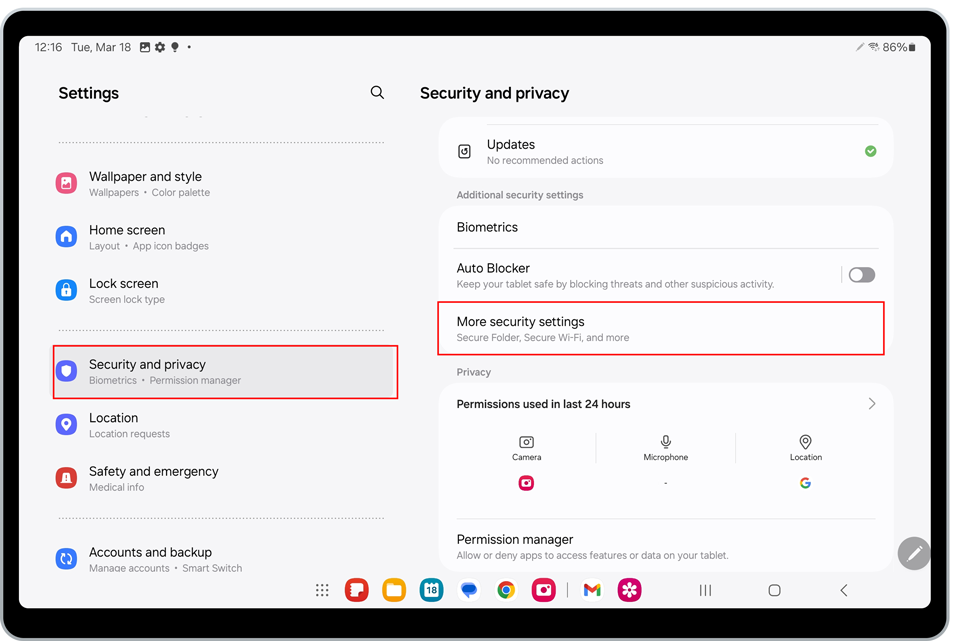
- To enable this feature, first open Settings, and then click on the section called Security and privacy.
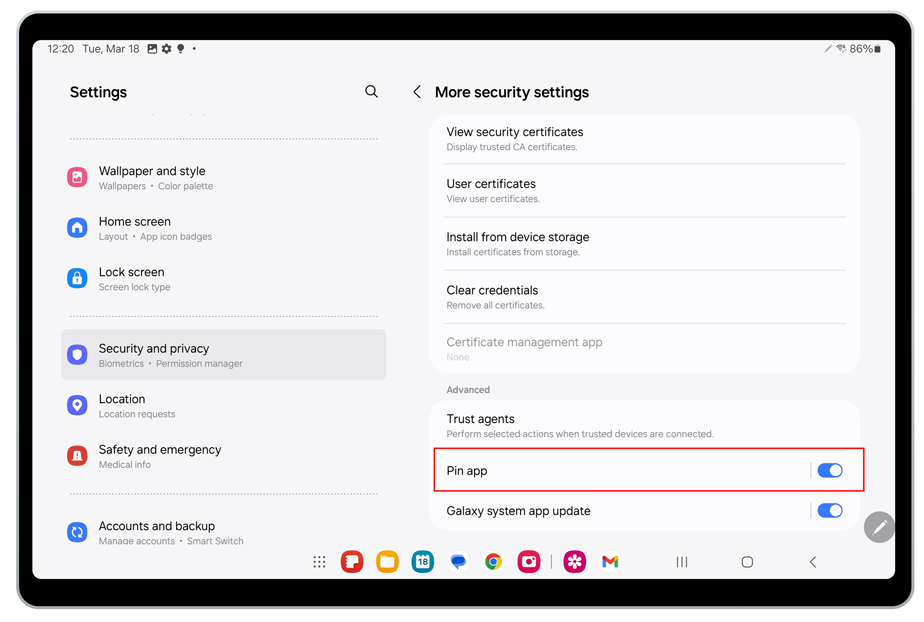
- Click on More security settings to access the second-level settings.
- Scroll down until you find the Pin app section, and click on the toggle to activate. Then, click on the Pin app to define its additional settings.
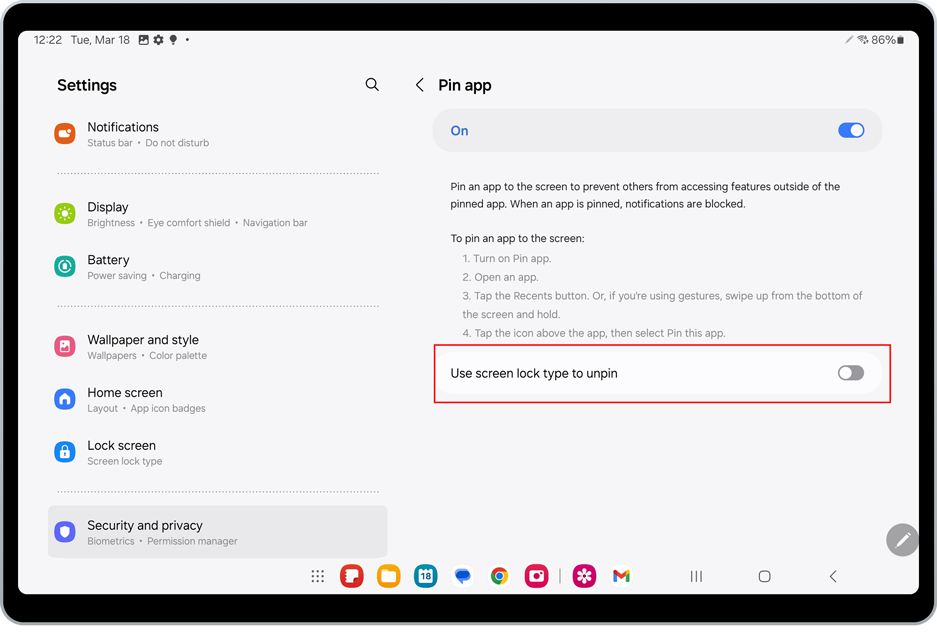
- If you don't already have a password set, follow the instructions to create a PIN or password by toggling on Use screen lock type to unpin. This will secure your device while displaying a pinned application.
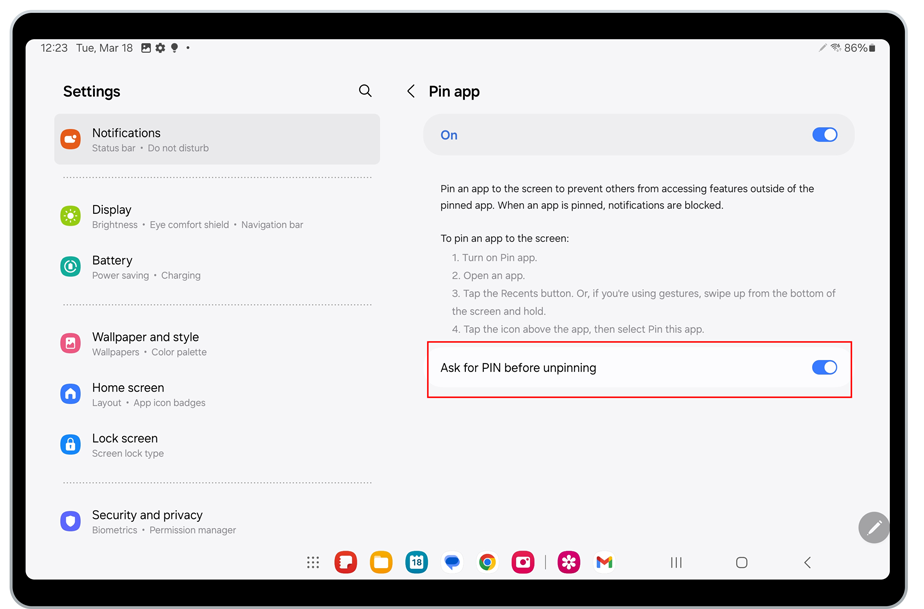
- Turn on the Ask for PIN before unpinning toggle to ensure that users cannot navigate away from the app once it has been pinned.
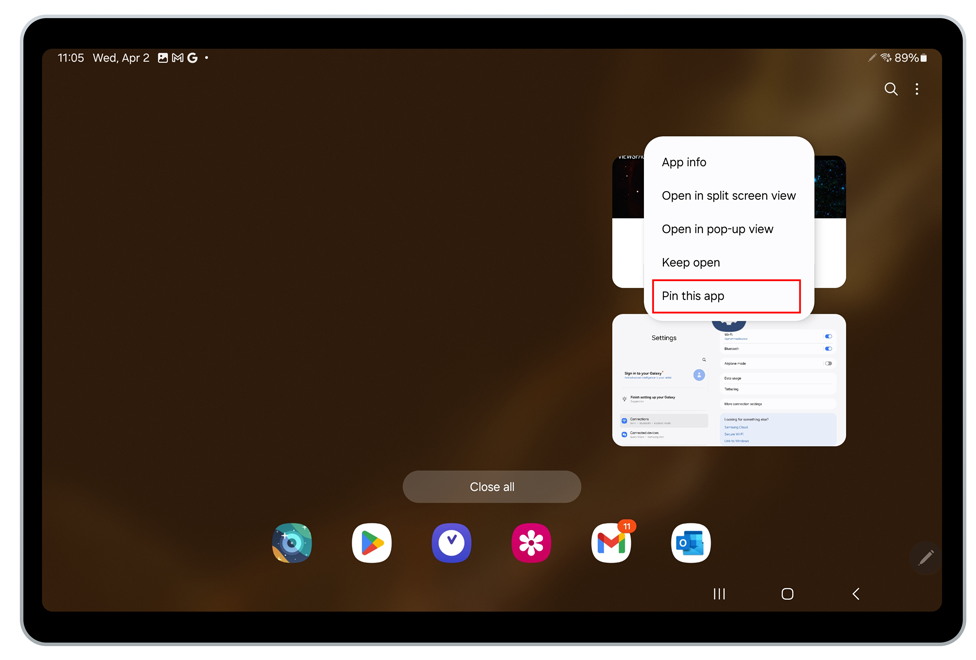
- Using the navigation bar at the bottom of your Home screen, click on the recent applications button (resembles three vertical tally marks) to open your recently opened apps. From there, click on the app icon to display the drop-down menu of options.

- Select Pin this app from the drop-down menu. This will pin the application or window on the Samsung tablet’s screen.
- With the app pinned on the screen, users will not be able to exit the app without knowing the unlock code or pattern that you have defined.
- To deactivate or stop pinning the App, press and hold the back icon (shown as an arrow pointing left) and recent applications button (shown as three vertical bars) at the same time.
Support and Contact Information
If you have trouble following any part of this document, cannot find answers to your questions within it, or wish to provide feedback, you can contact us directly at: support@viewspace.org. We highly encourage all users to join our mailing list, which allows you to stay informed about ViewSpace updates, new features, and fixes.
Note: If you are experiencing issues playing videos in Kiosk Mode, please review this guide’s Section H. Kiosk Mode Troubleshooting & Support.